- Published on
Hester: Alchemist Game Character
- Authors
- Name
- Becky Haystar
- @beckyhaystar


This was a project to create a witch-turned-alchemist game character who has relocated to a new town to open a shop (and investigate unusual happenings). In this post I'll share my experience and the lessons I learned while making this character.
 Final animation of Hester
 Final animation of Hester
 Turnaround in rest pose
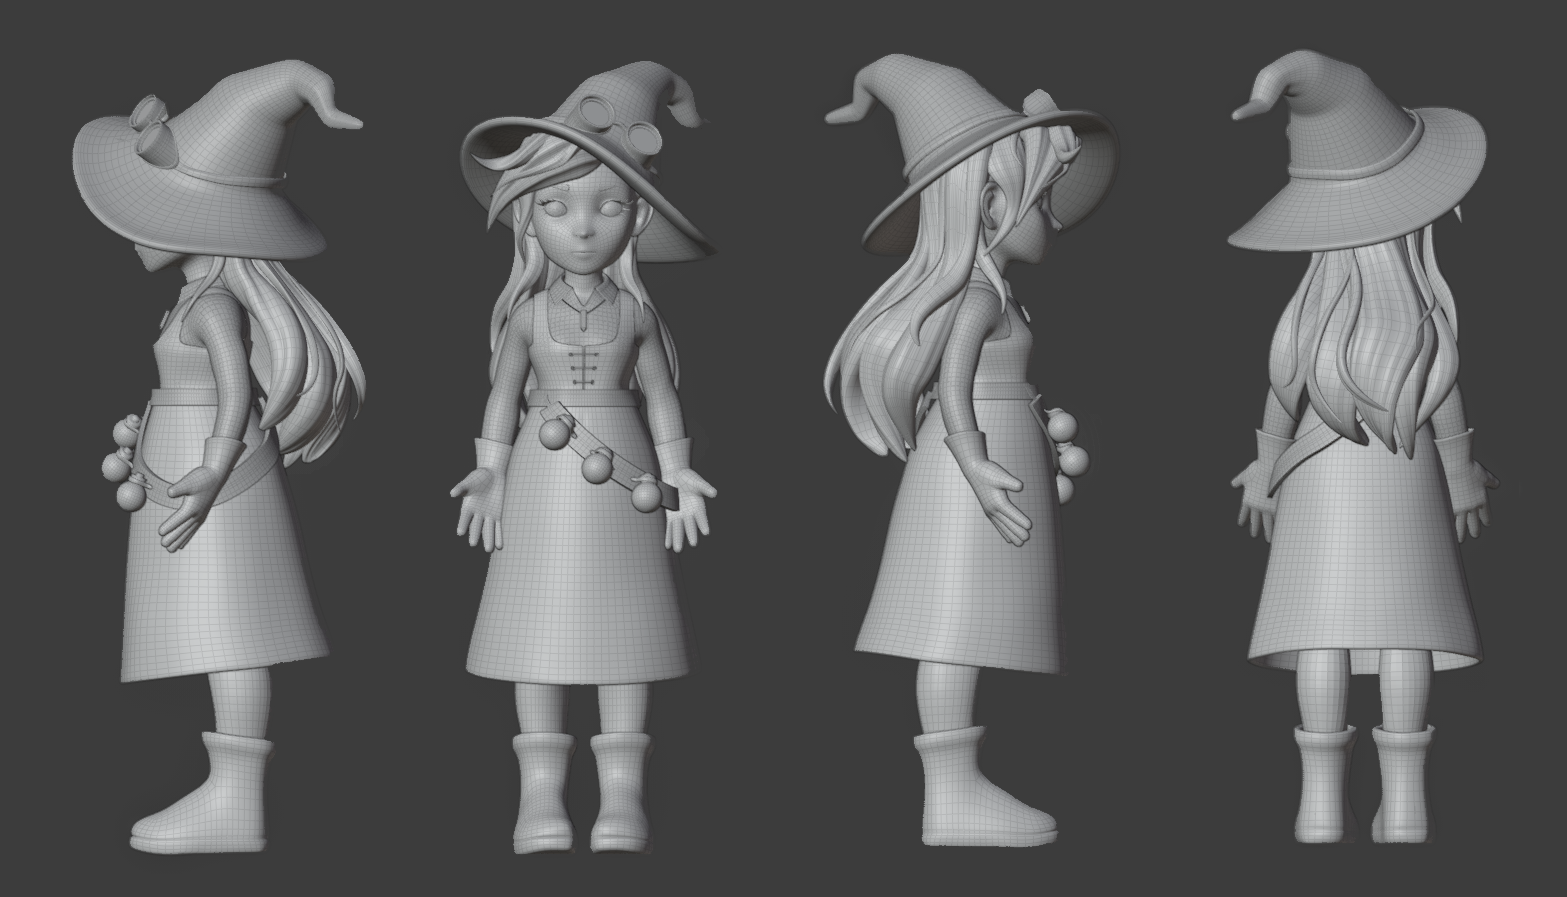 Hester model mesh
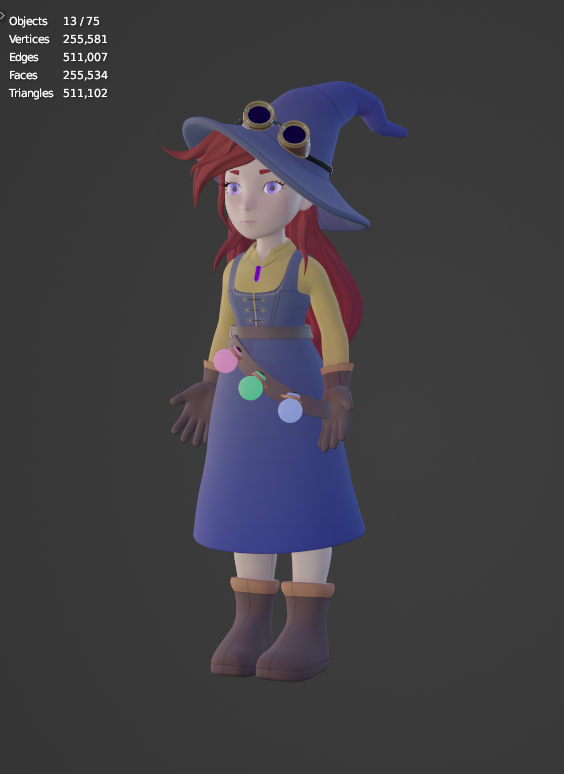 Model stats
Character Design
To begin, I filled in some details in the brief to form a more complete character design. I named the character Hester and made her a curious, reliable, and enthusiastic character, befitting her role as an investigator. My goal was to accurately reflect Hester's personality traits in her design.
- To express reliability I made her design bottom-heavy, i.e. with a stable base
- To express curiosity and enthusiasm I included a lot of curves and rounded shapes
My process for the design involved:
- Creating moodboard to start getting some ideas for shapes, elements and colours
 Moodboard made using Obsidian.md
- Quick and loose sketches to try out some shapes
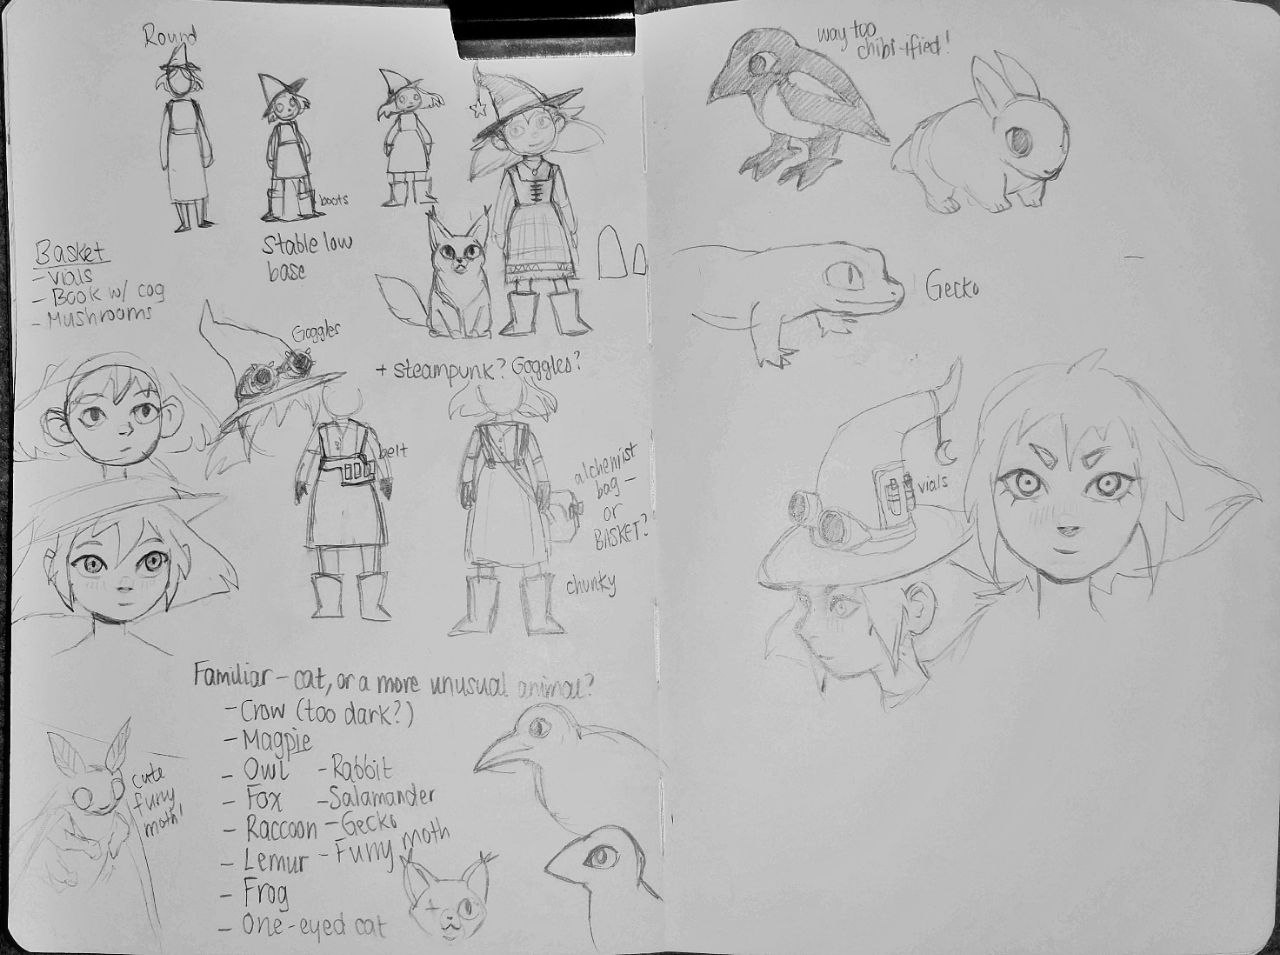 Ideation sketches
- Iteration to see the effect of different shapes, colours and proportions
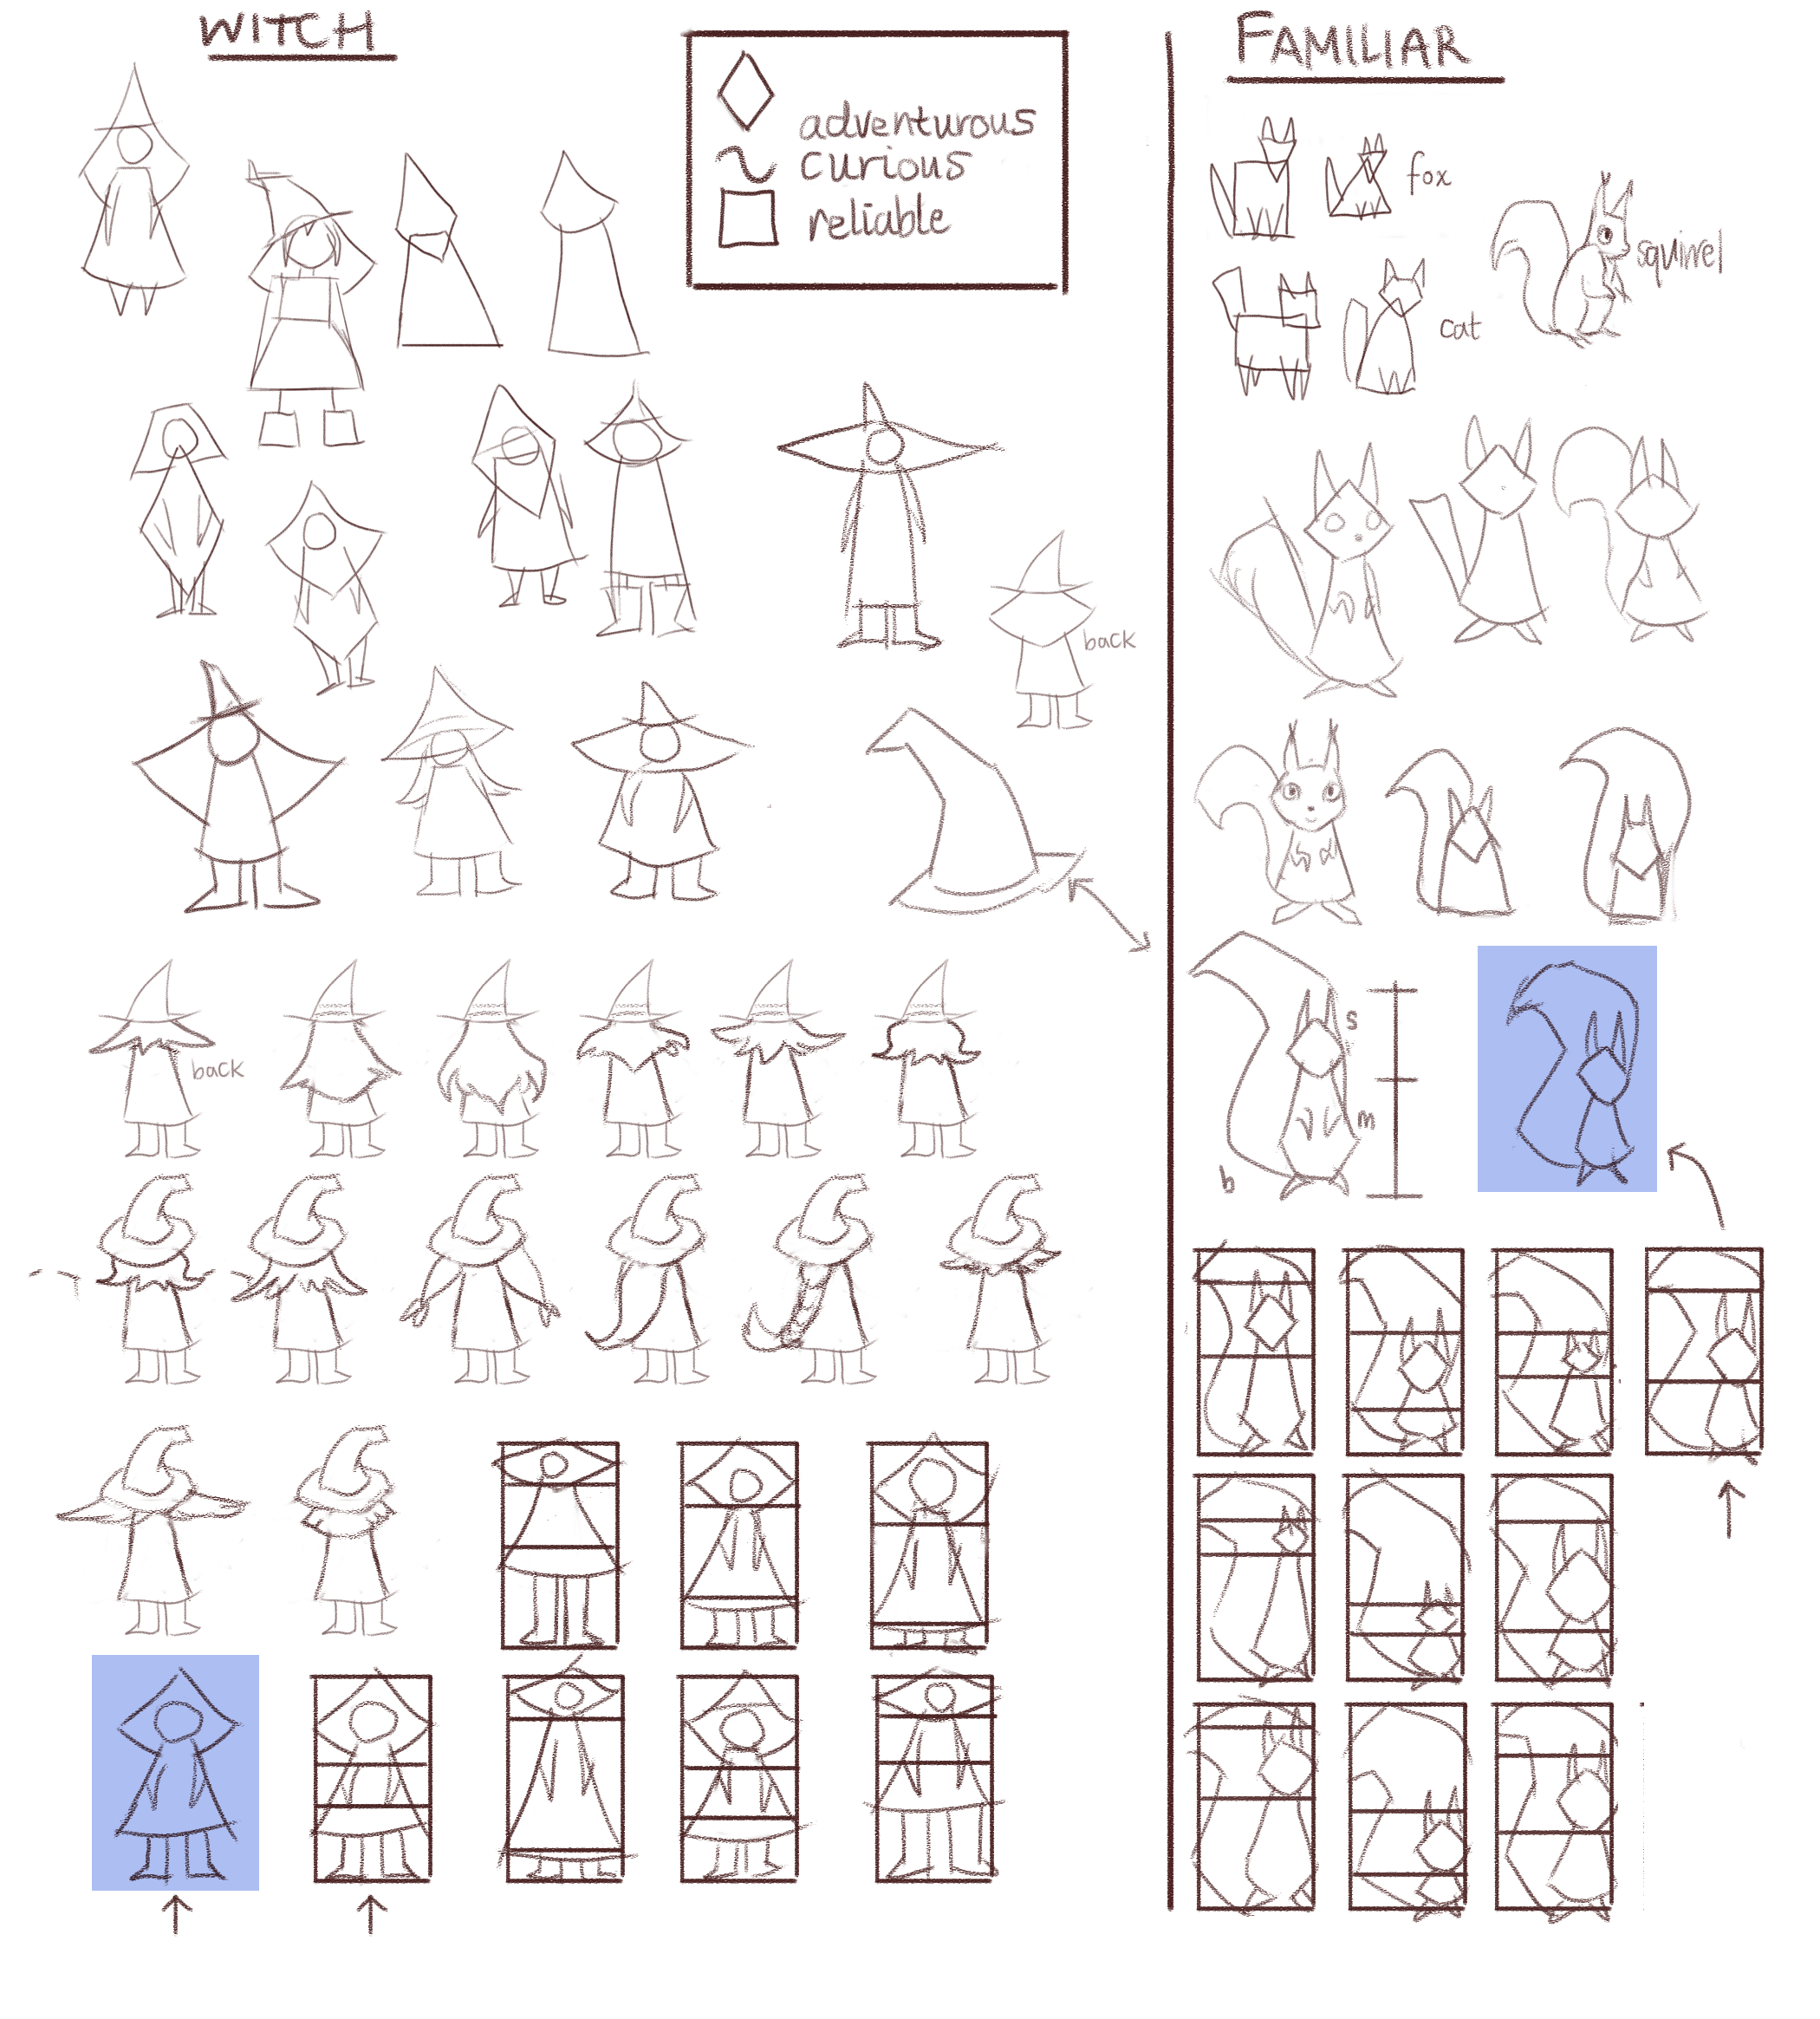 Iteration on shapes
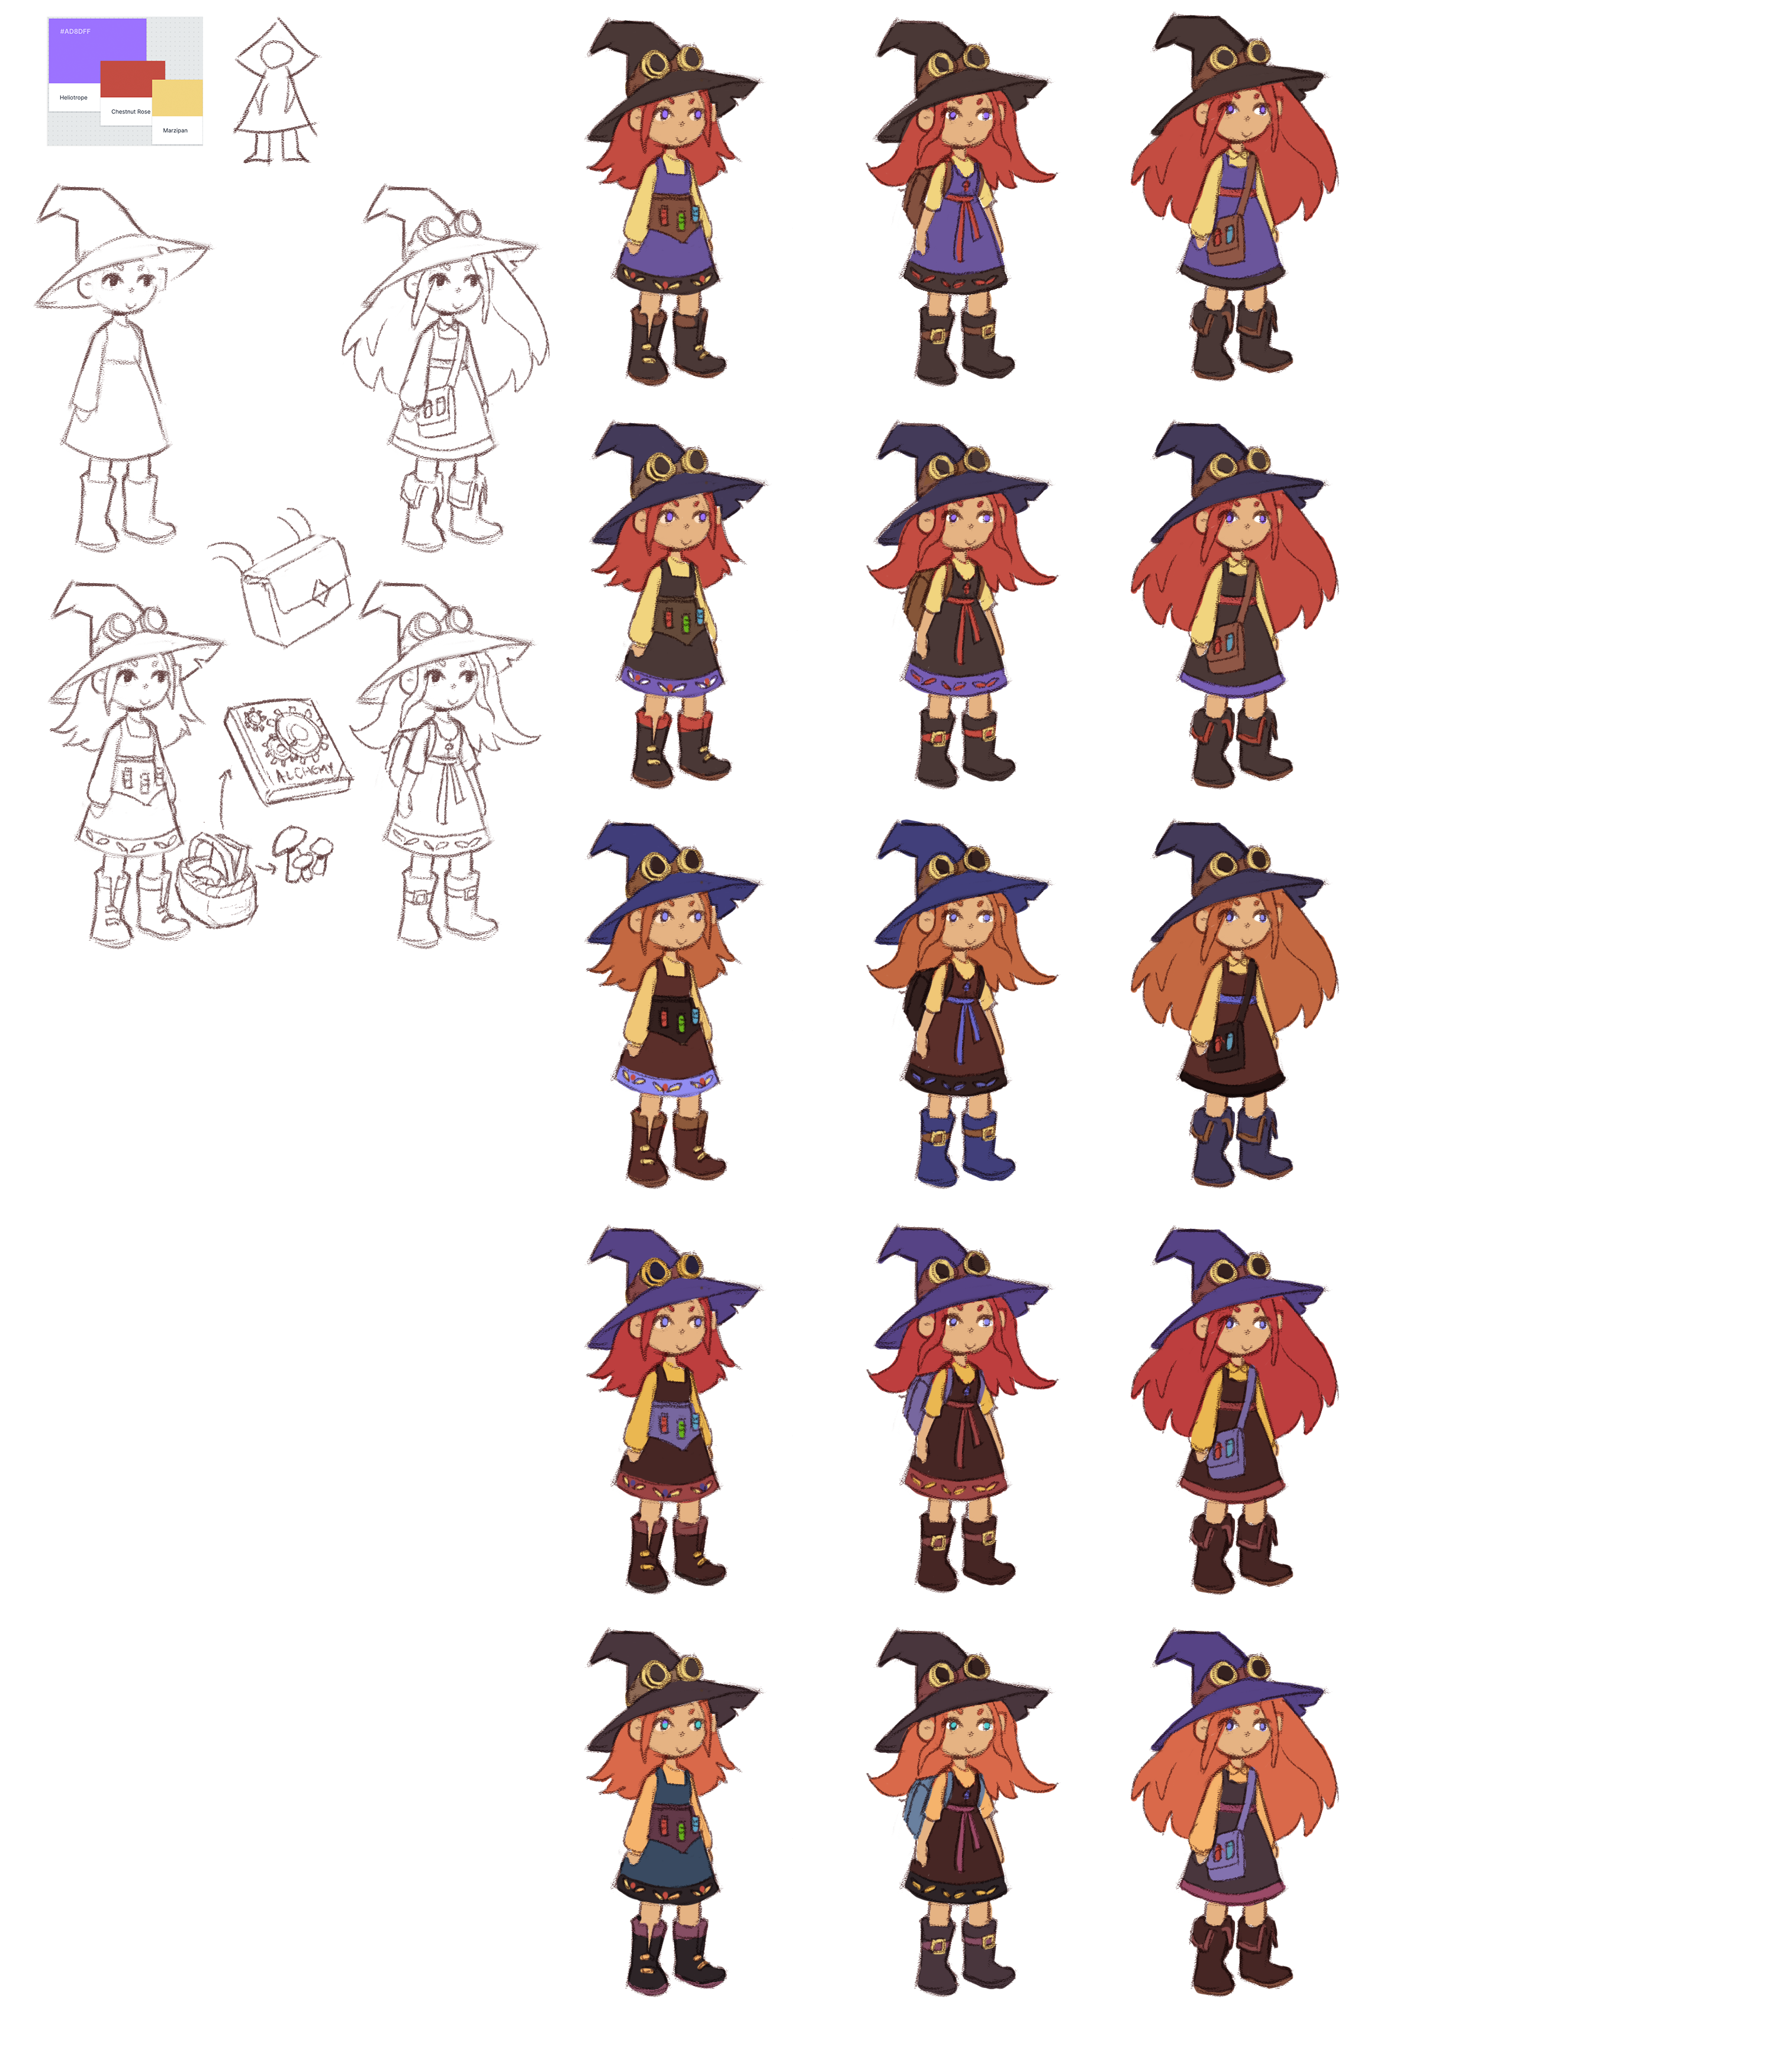 Iteration on colours
Ultimately, I chose a design featuring a recurring bell shape in both the dress and hair. I also included accessories to showcase her profession as a witch, such as a witch's hat, steampunk goggles, and an alchemist belt with potion bottles
To help with 3D modelling, I made a basic front and side view sheet.
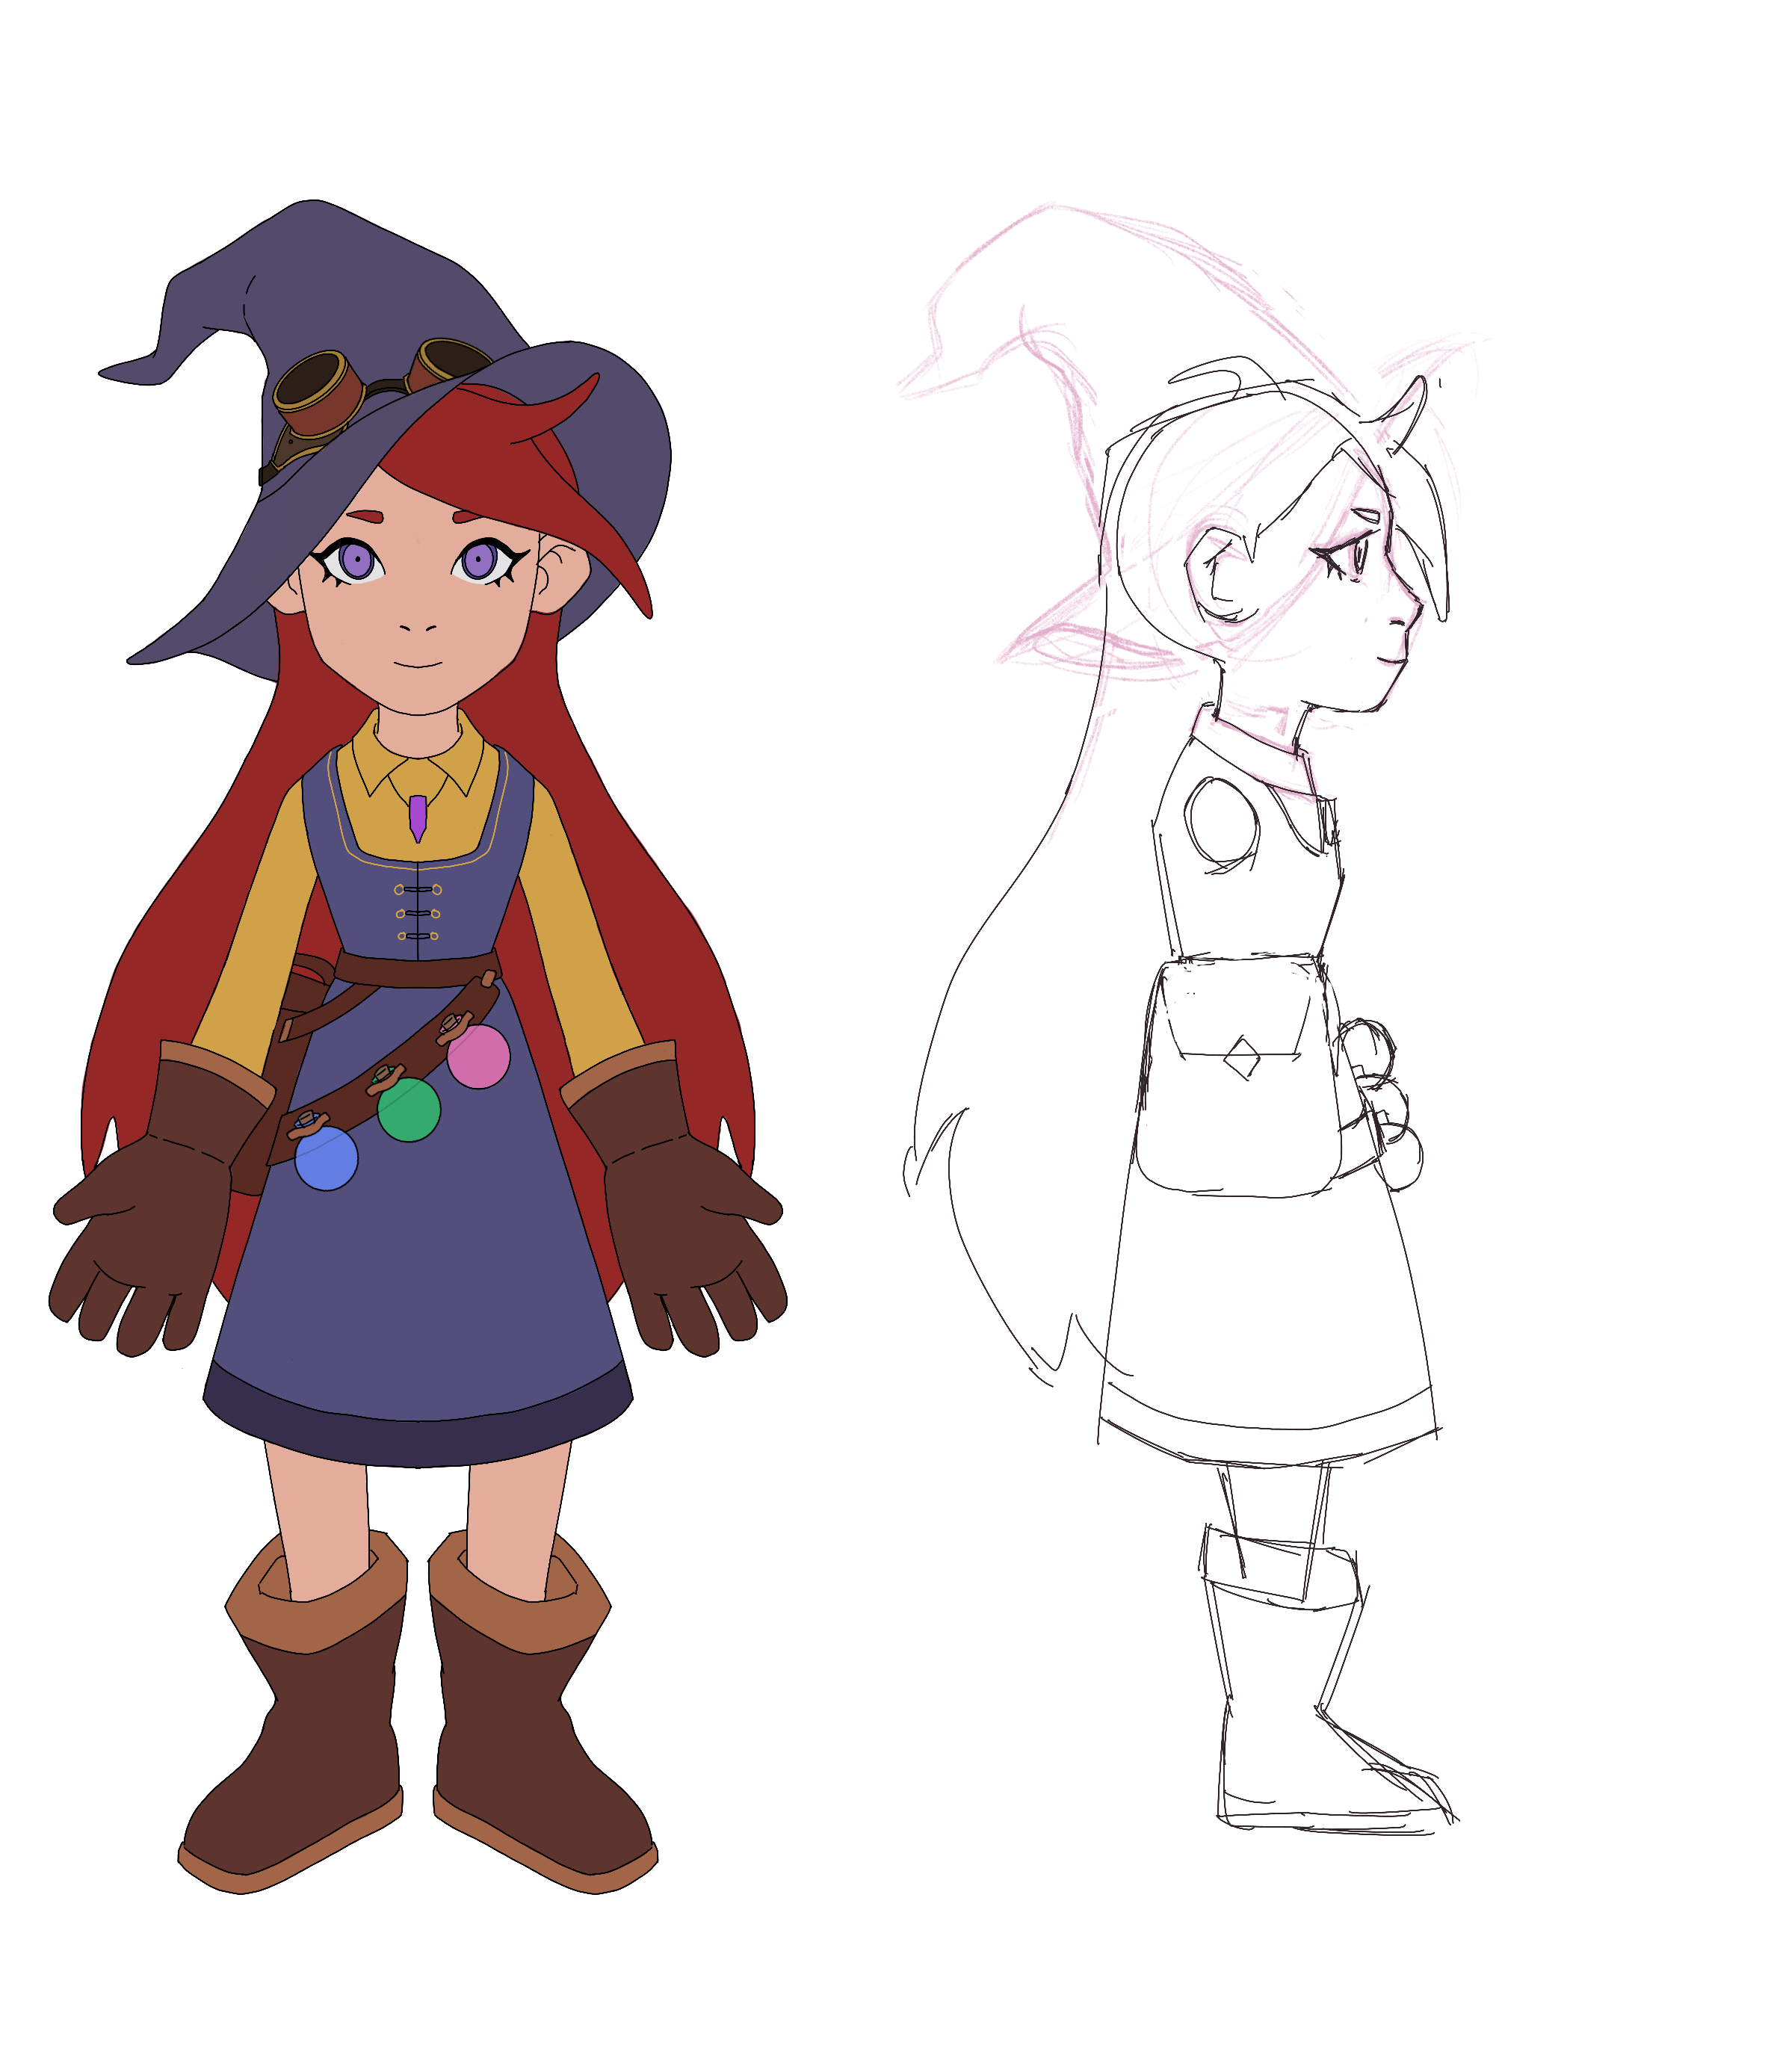 Hester model sheet
3D Modelling
I modelling this character using Blender. My process was as follows:
- Head sculpting
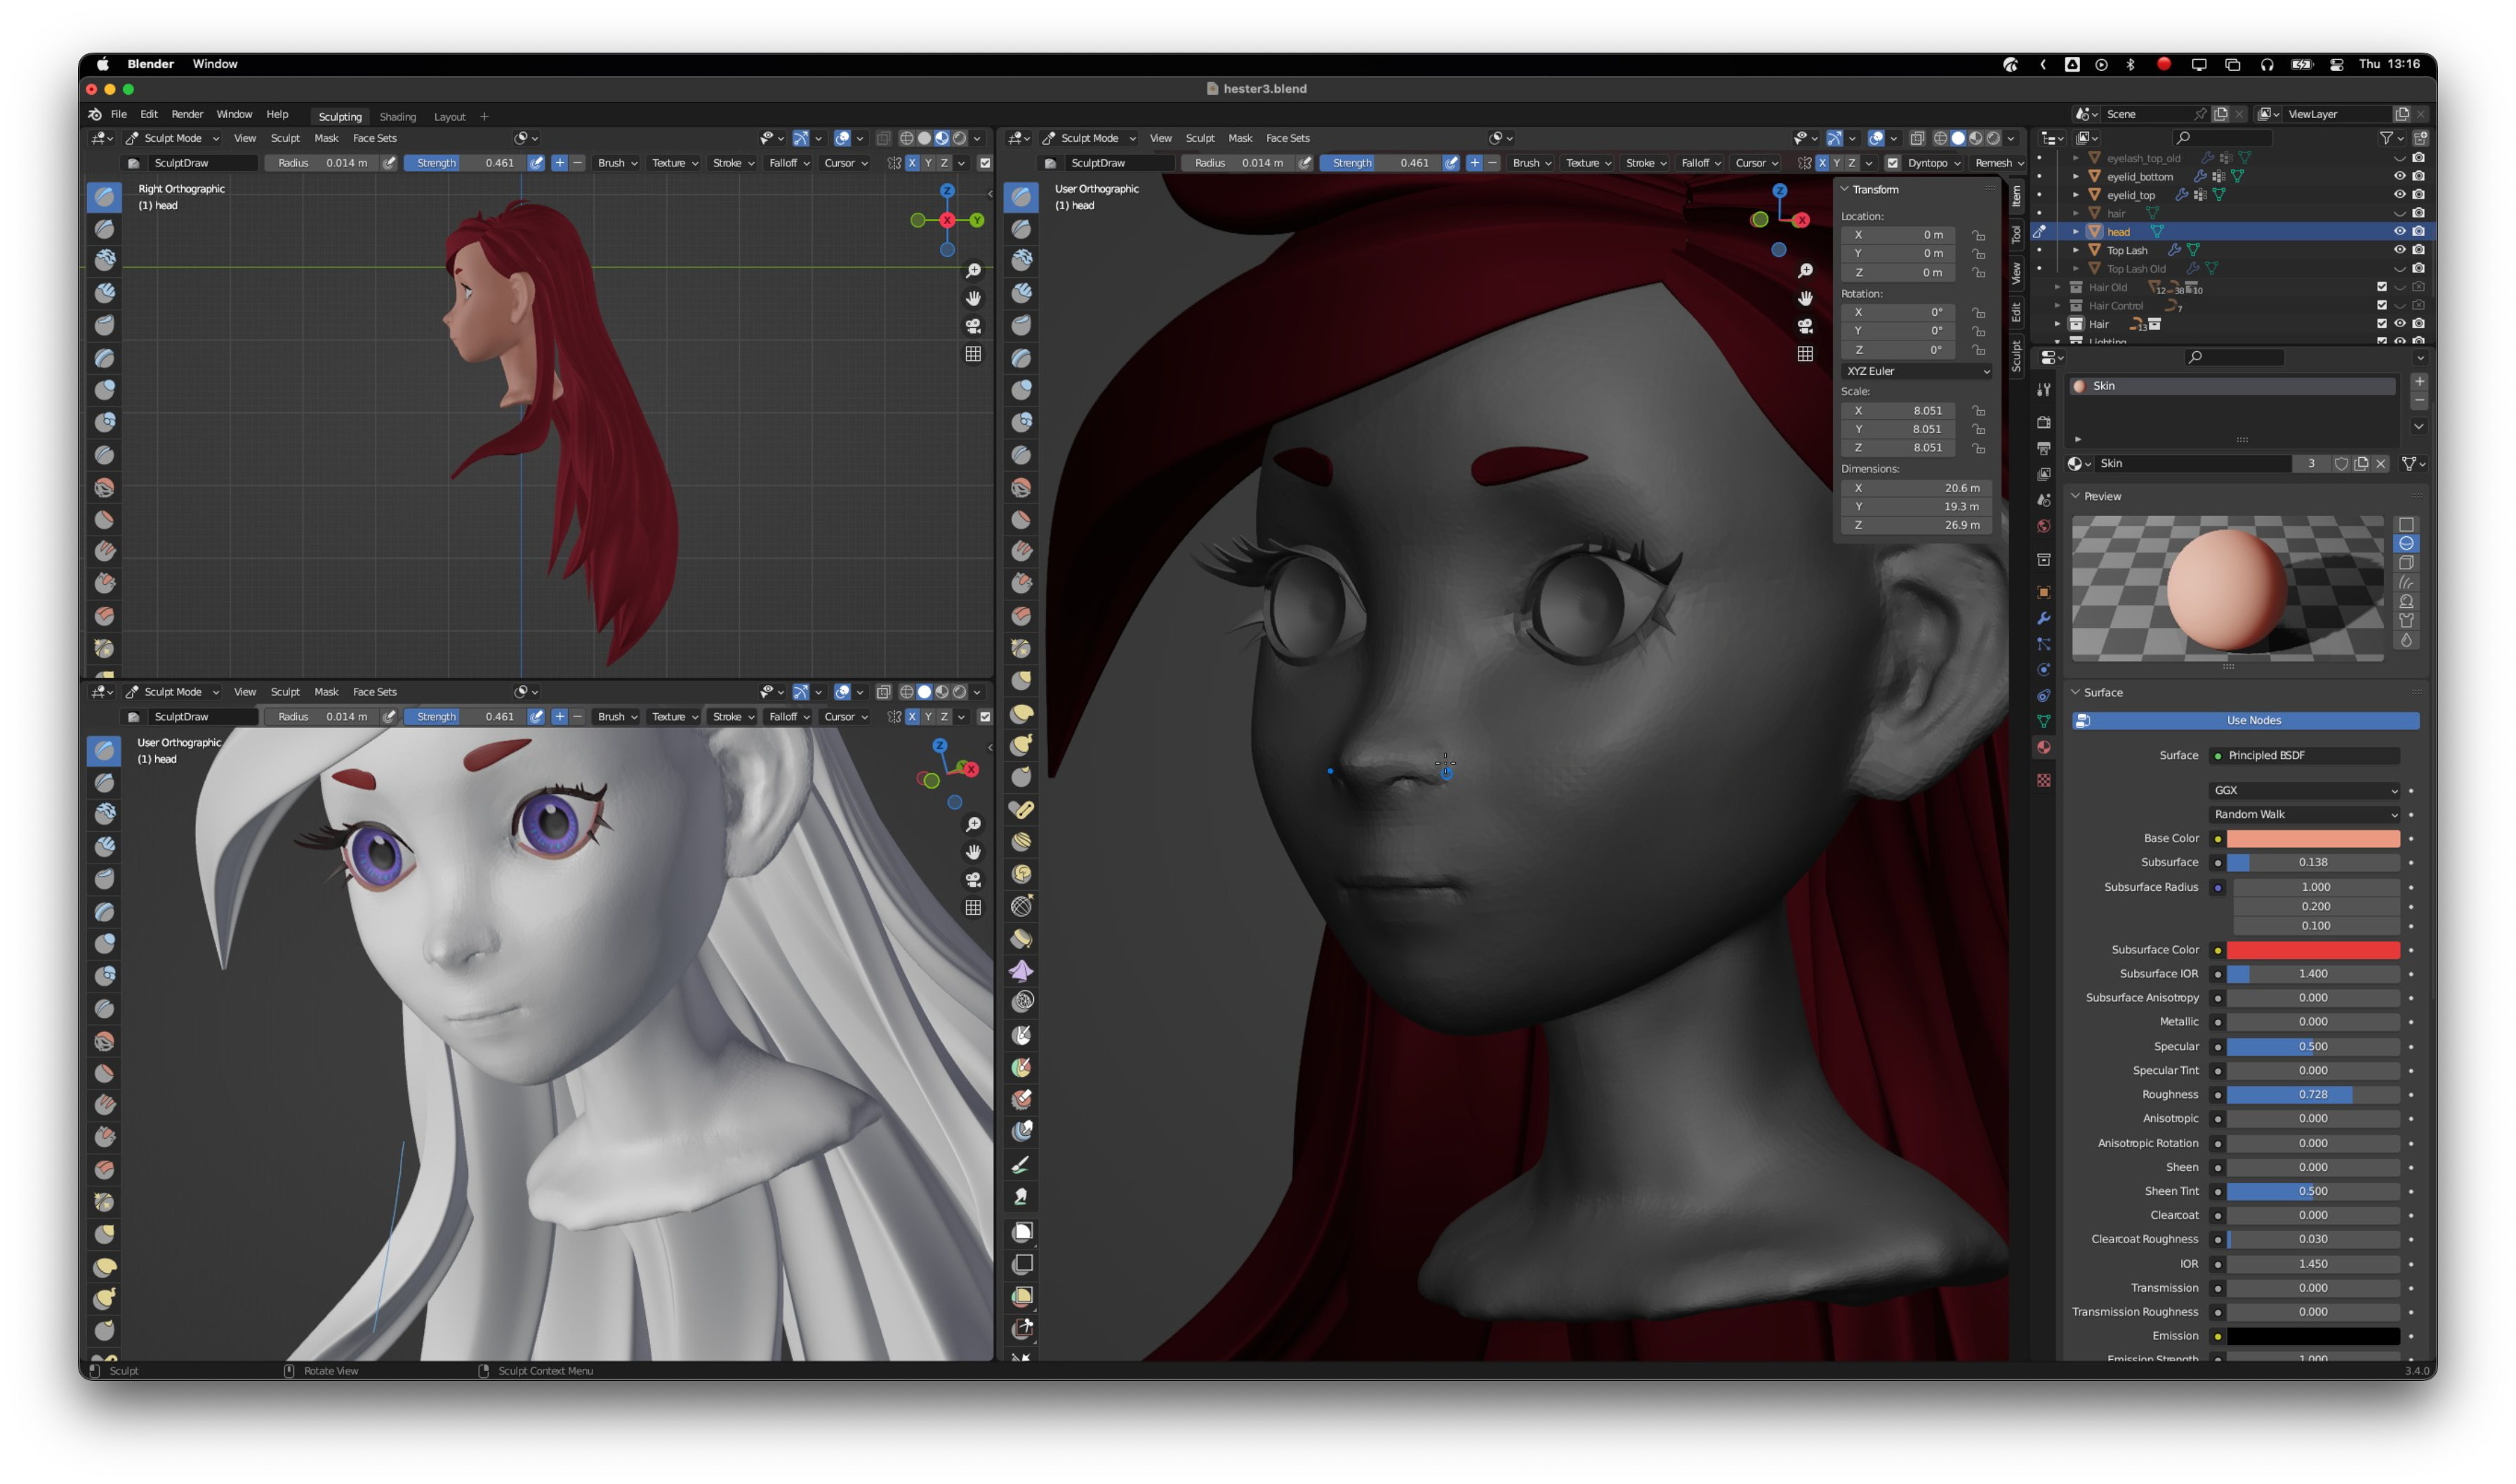 Head sculpting
- Body sculpting
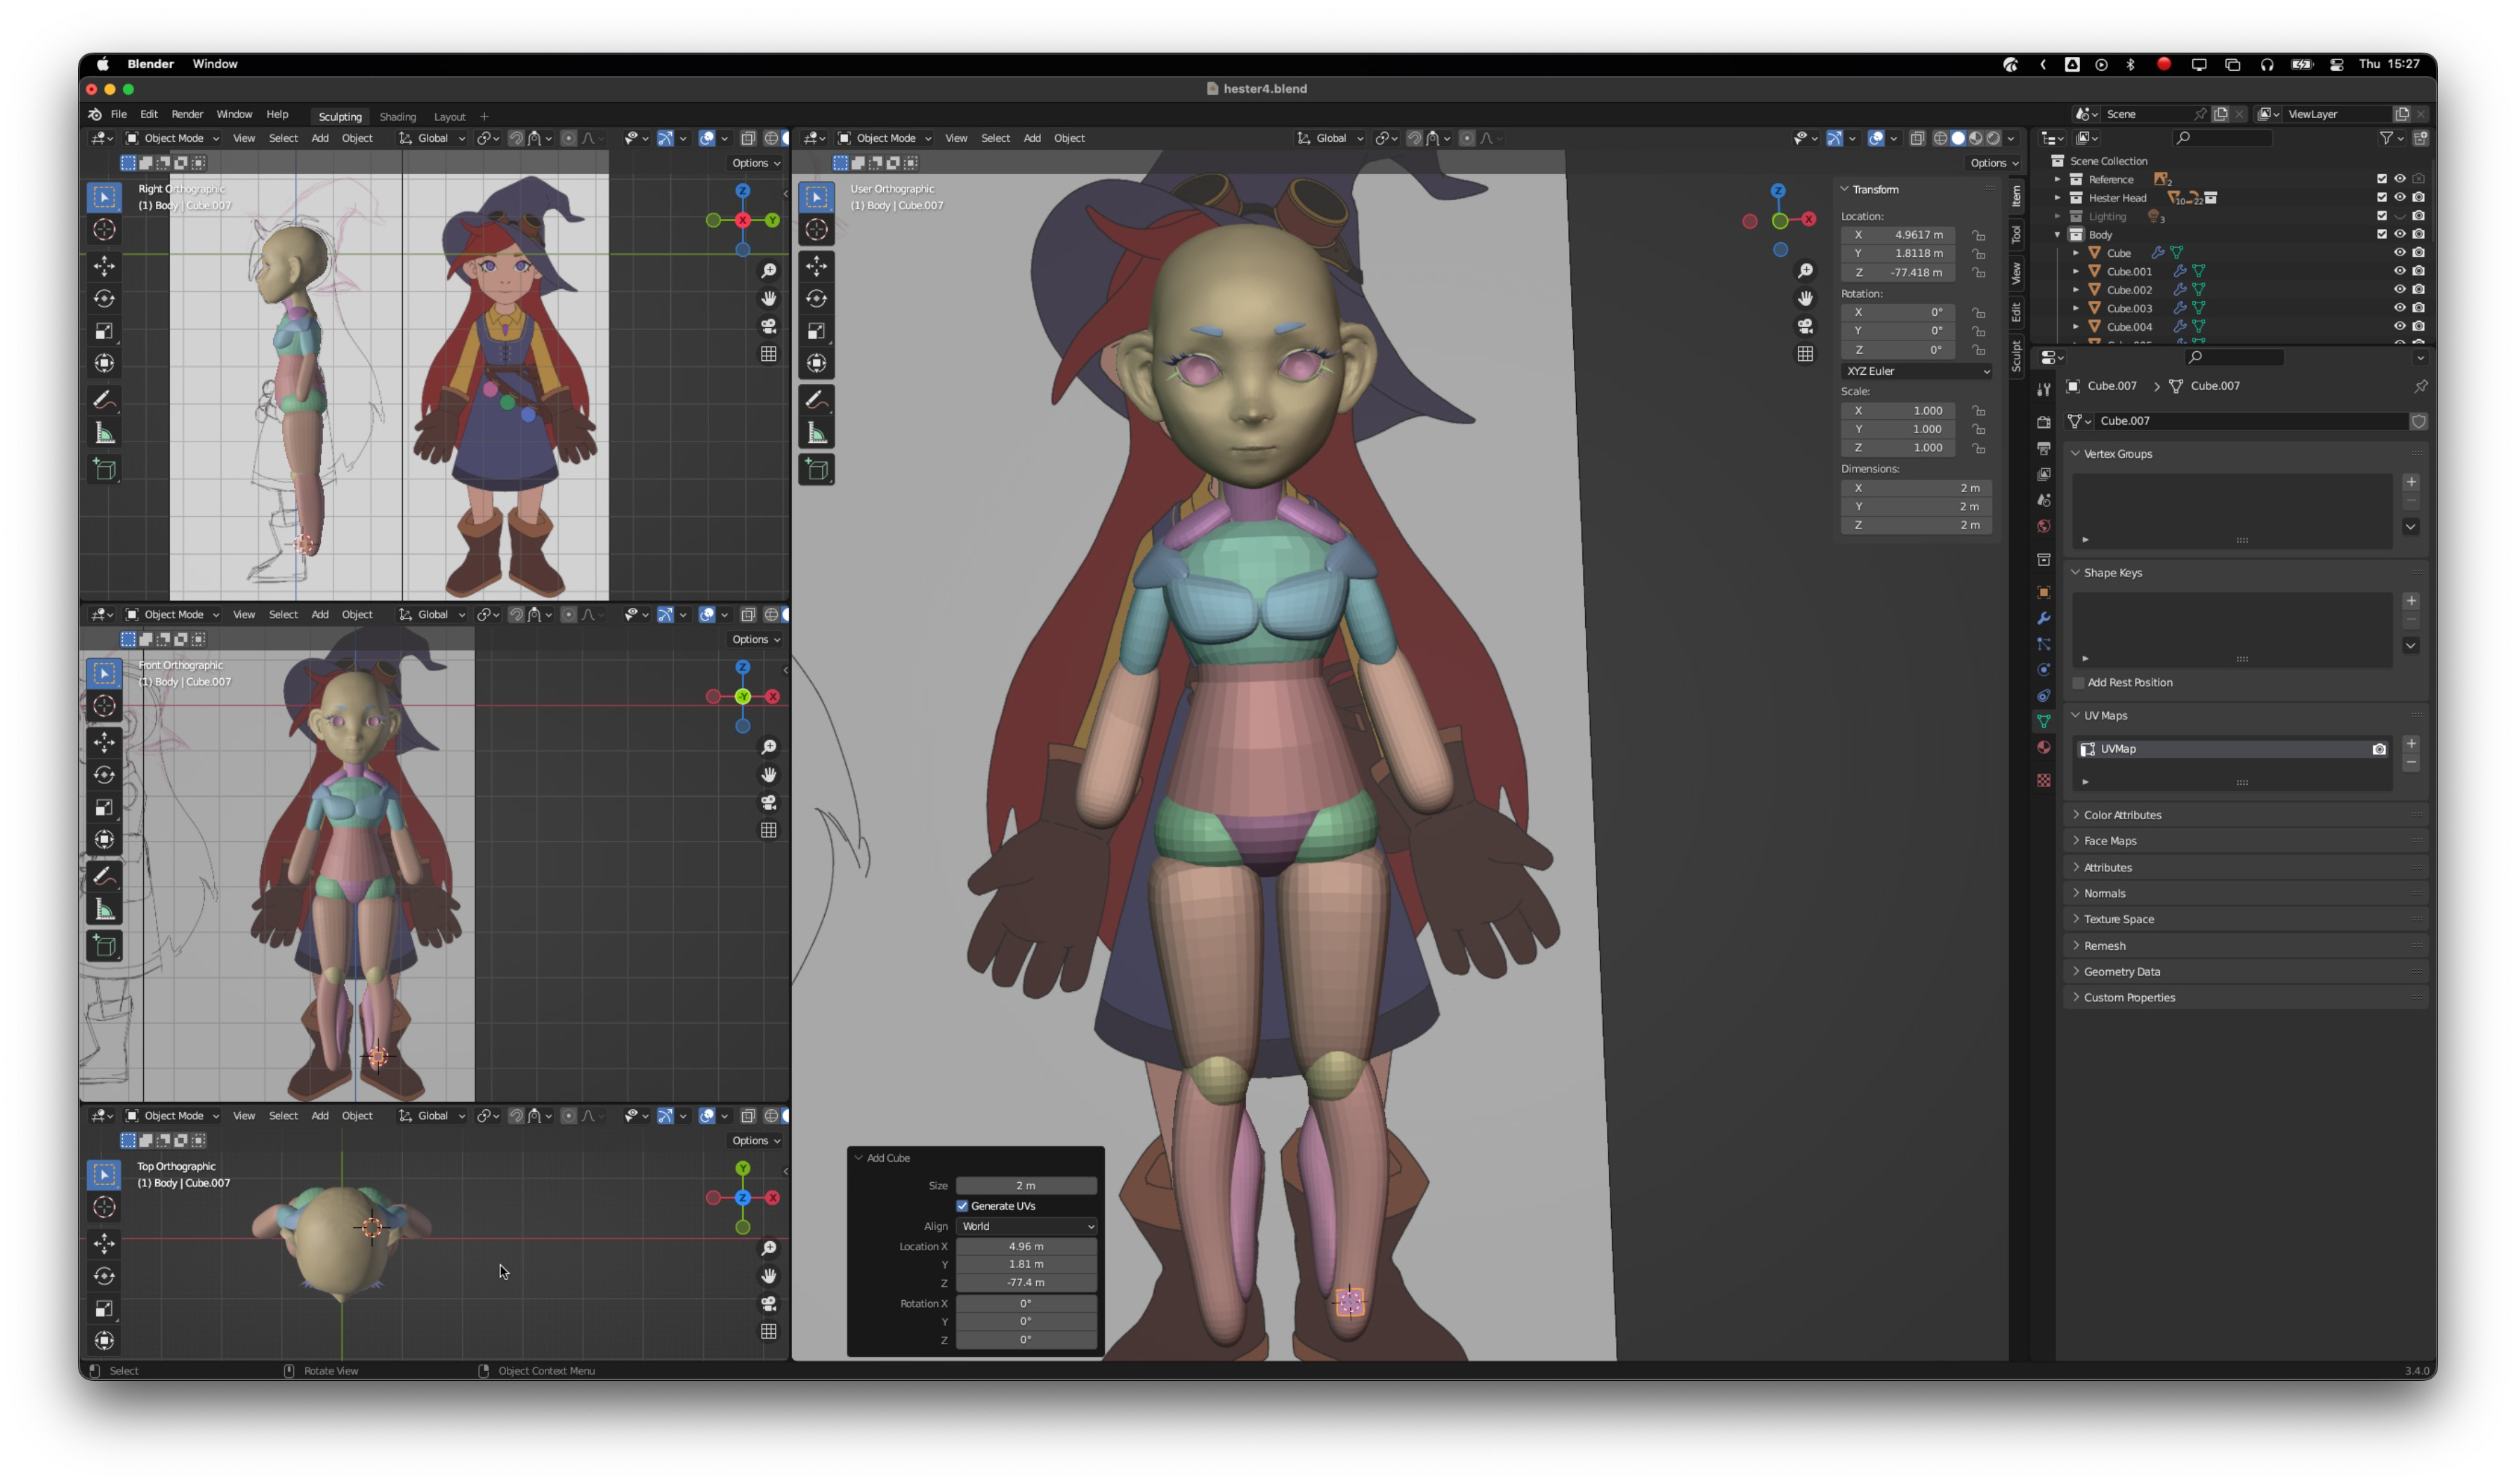 Body sculpting
- Clothes and accessories sculpting
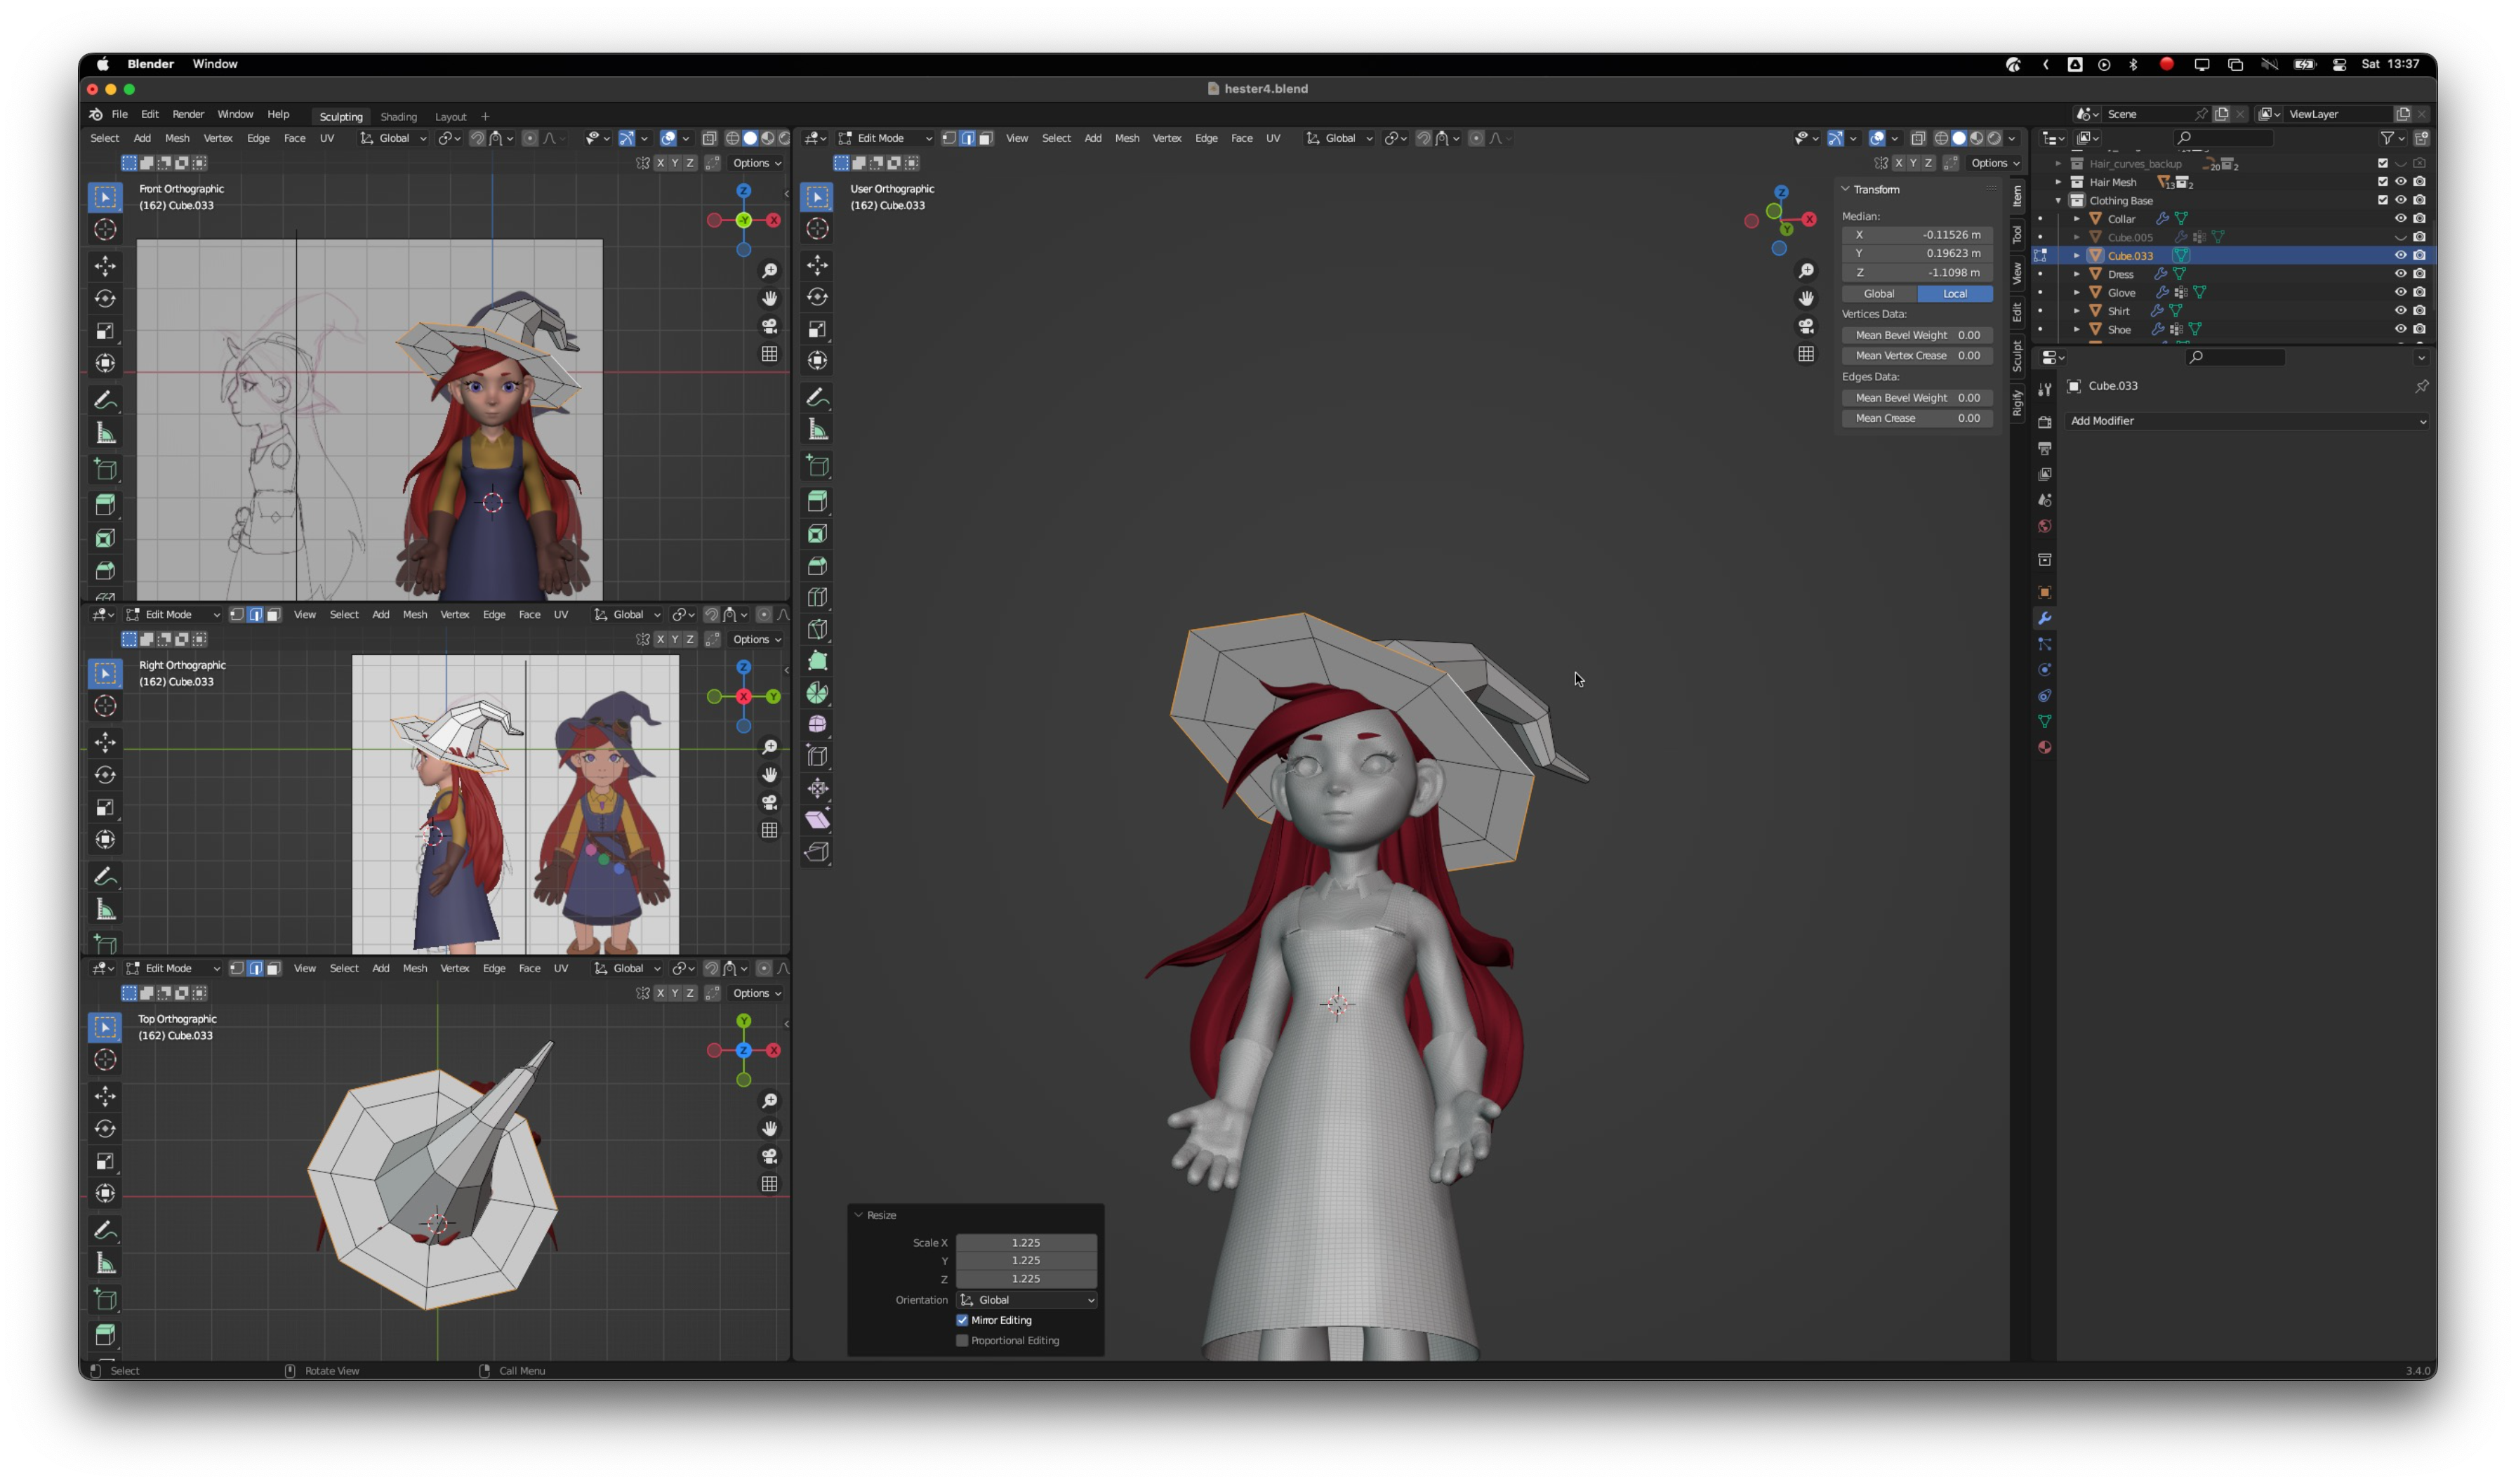 Modelling the hat
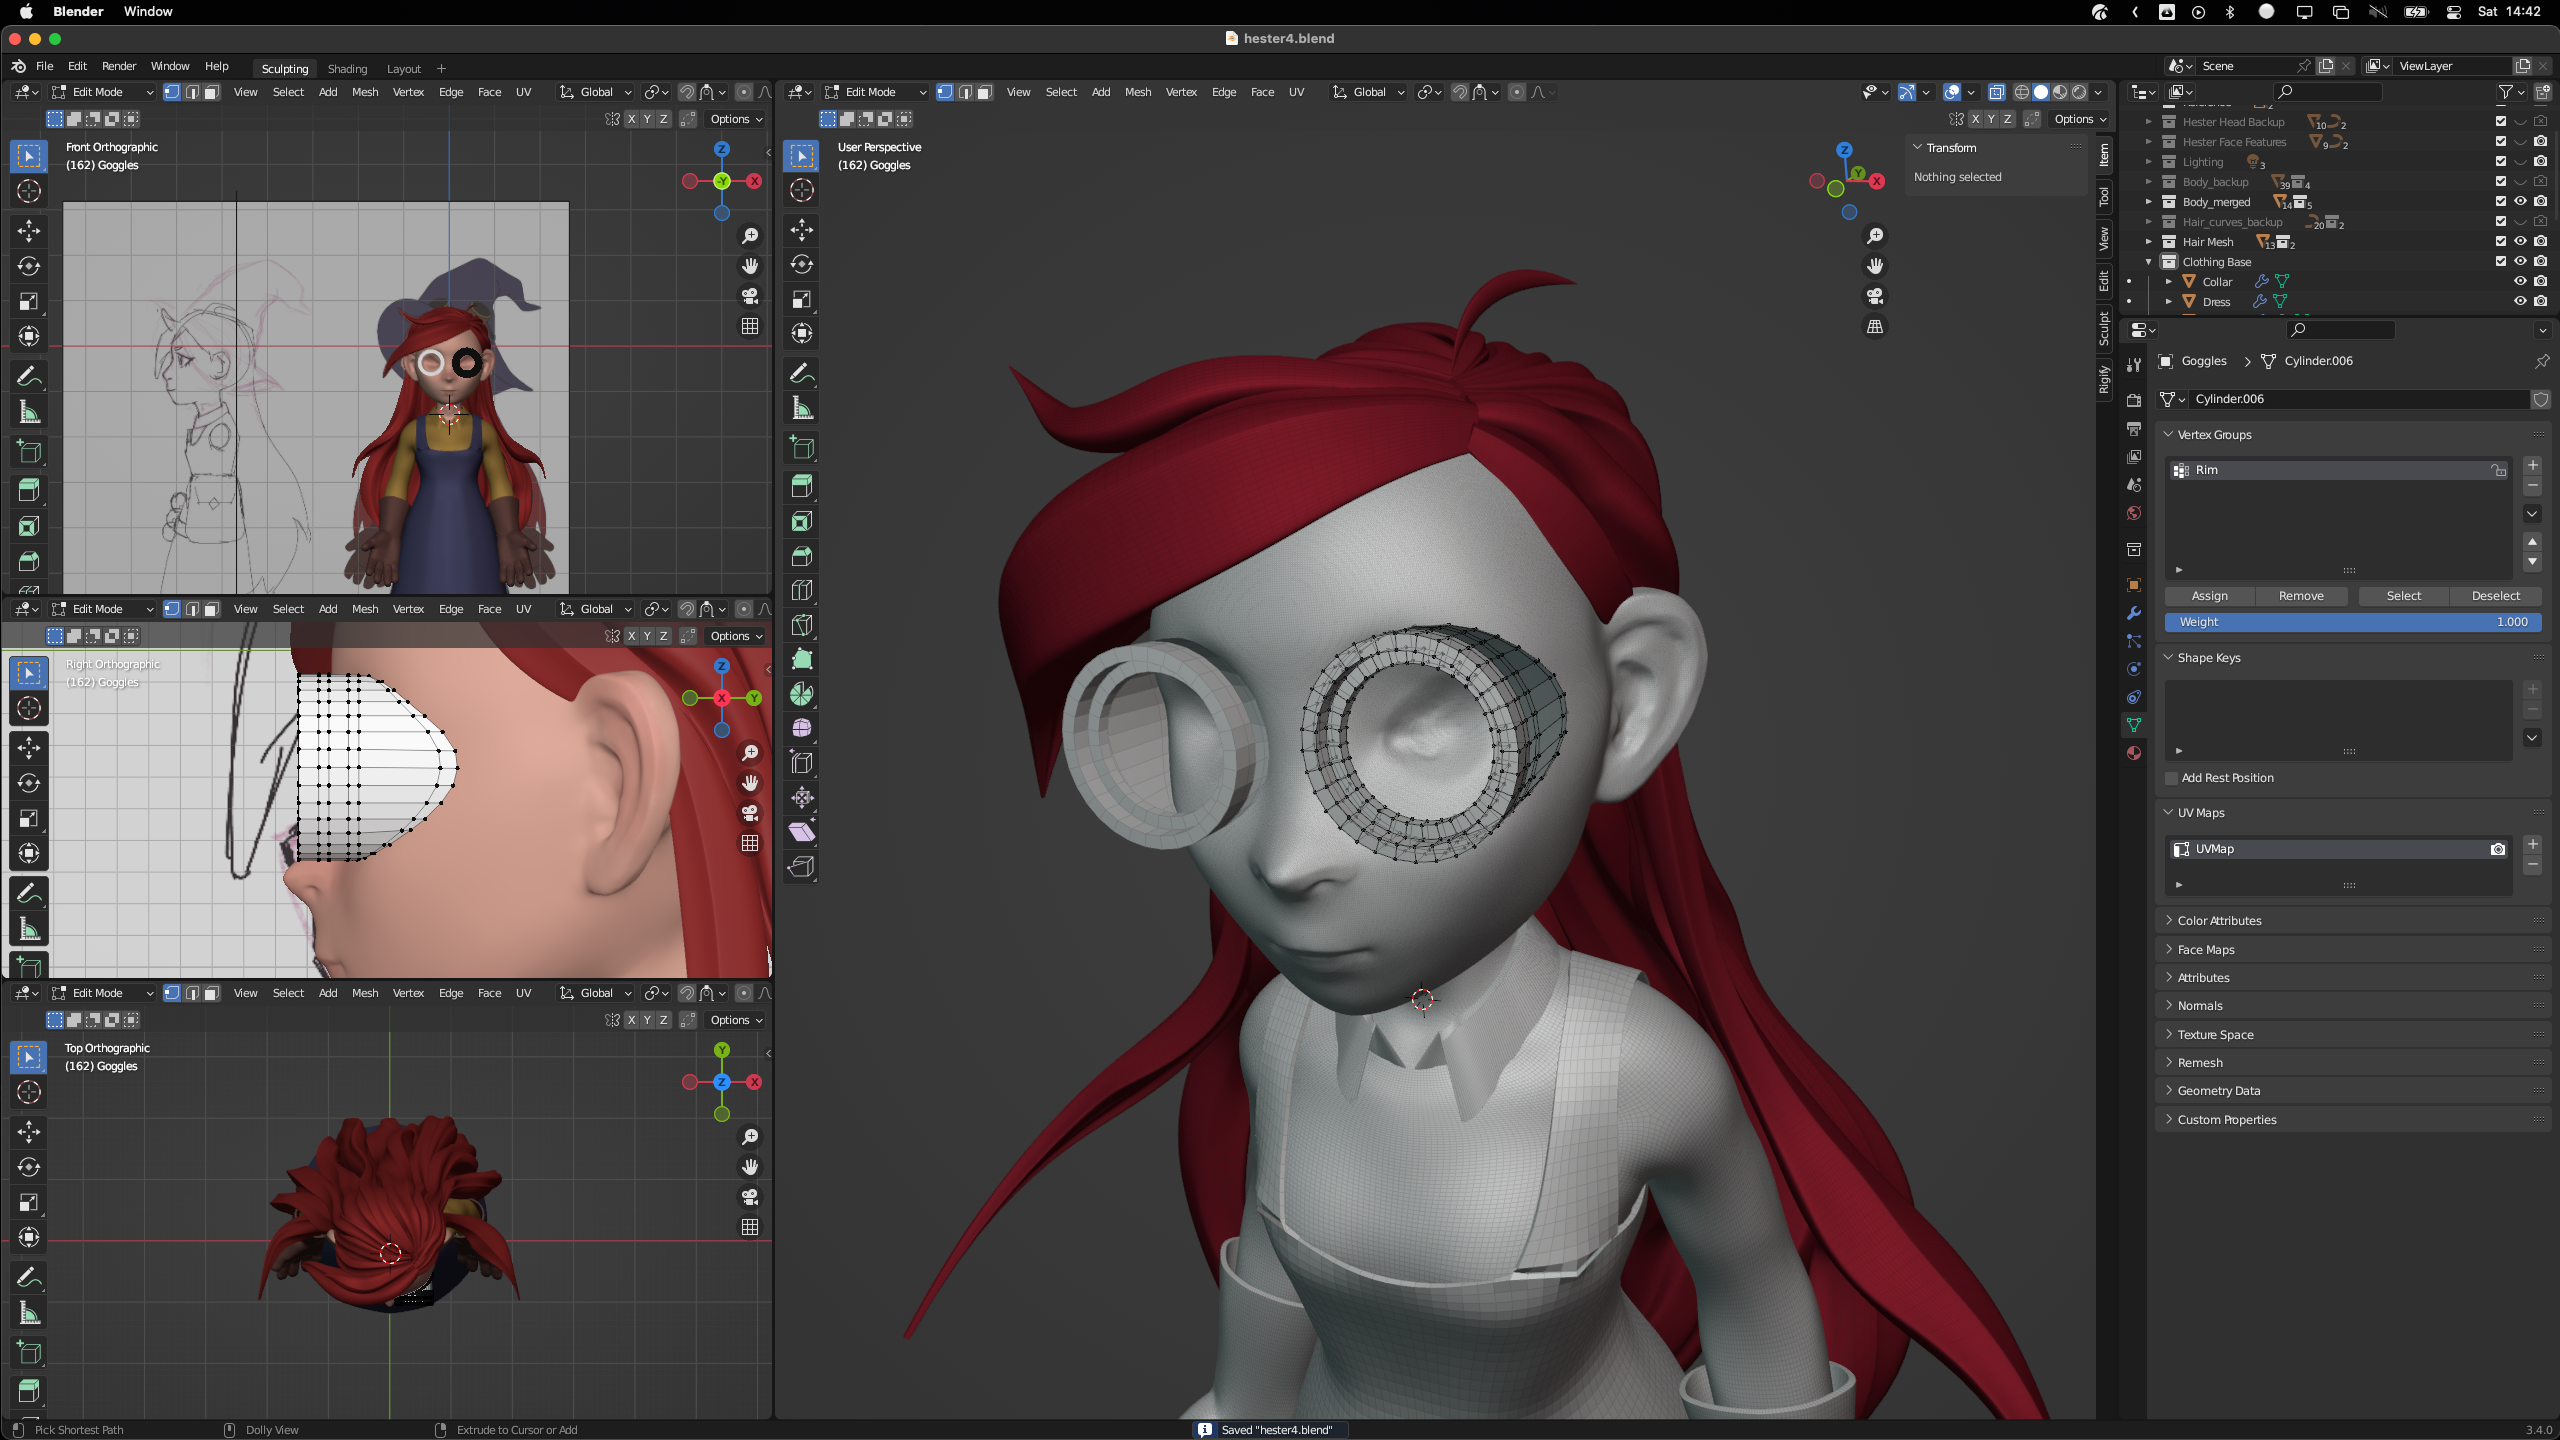 Modelling the goggles
- Hair sculpting (using curves)
 Modelling the hair
- Retopology
 Retopologising the body
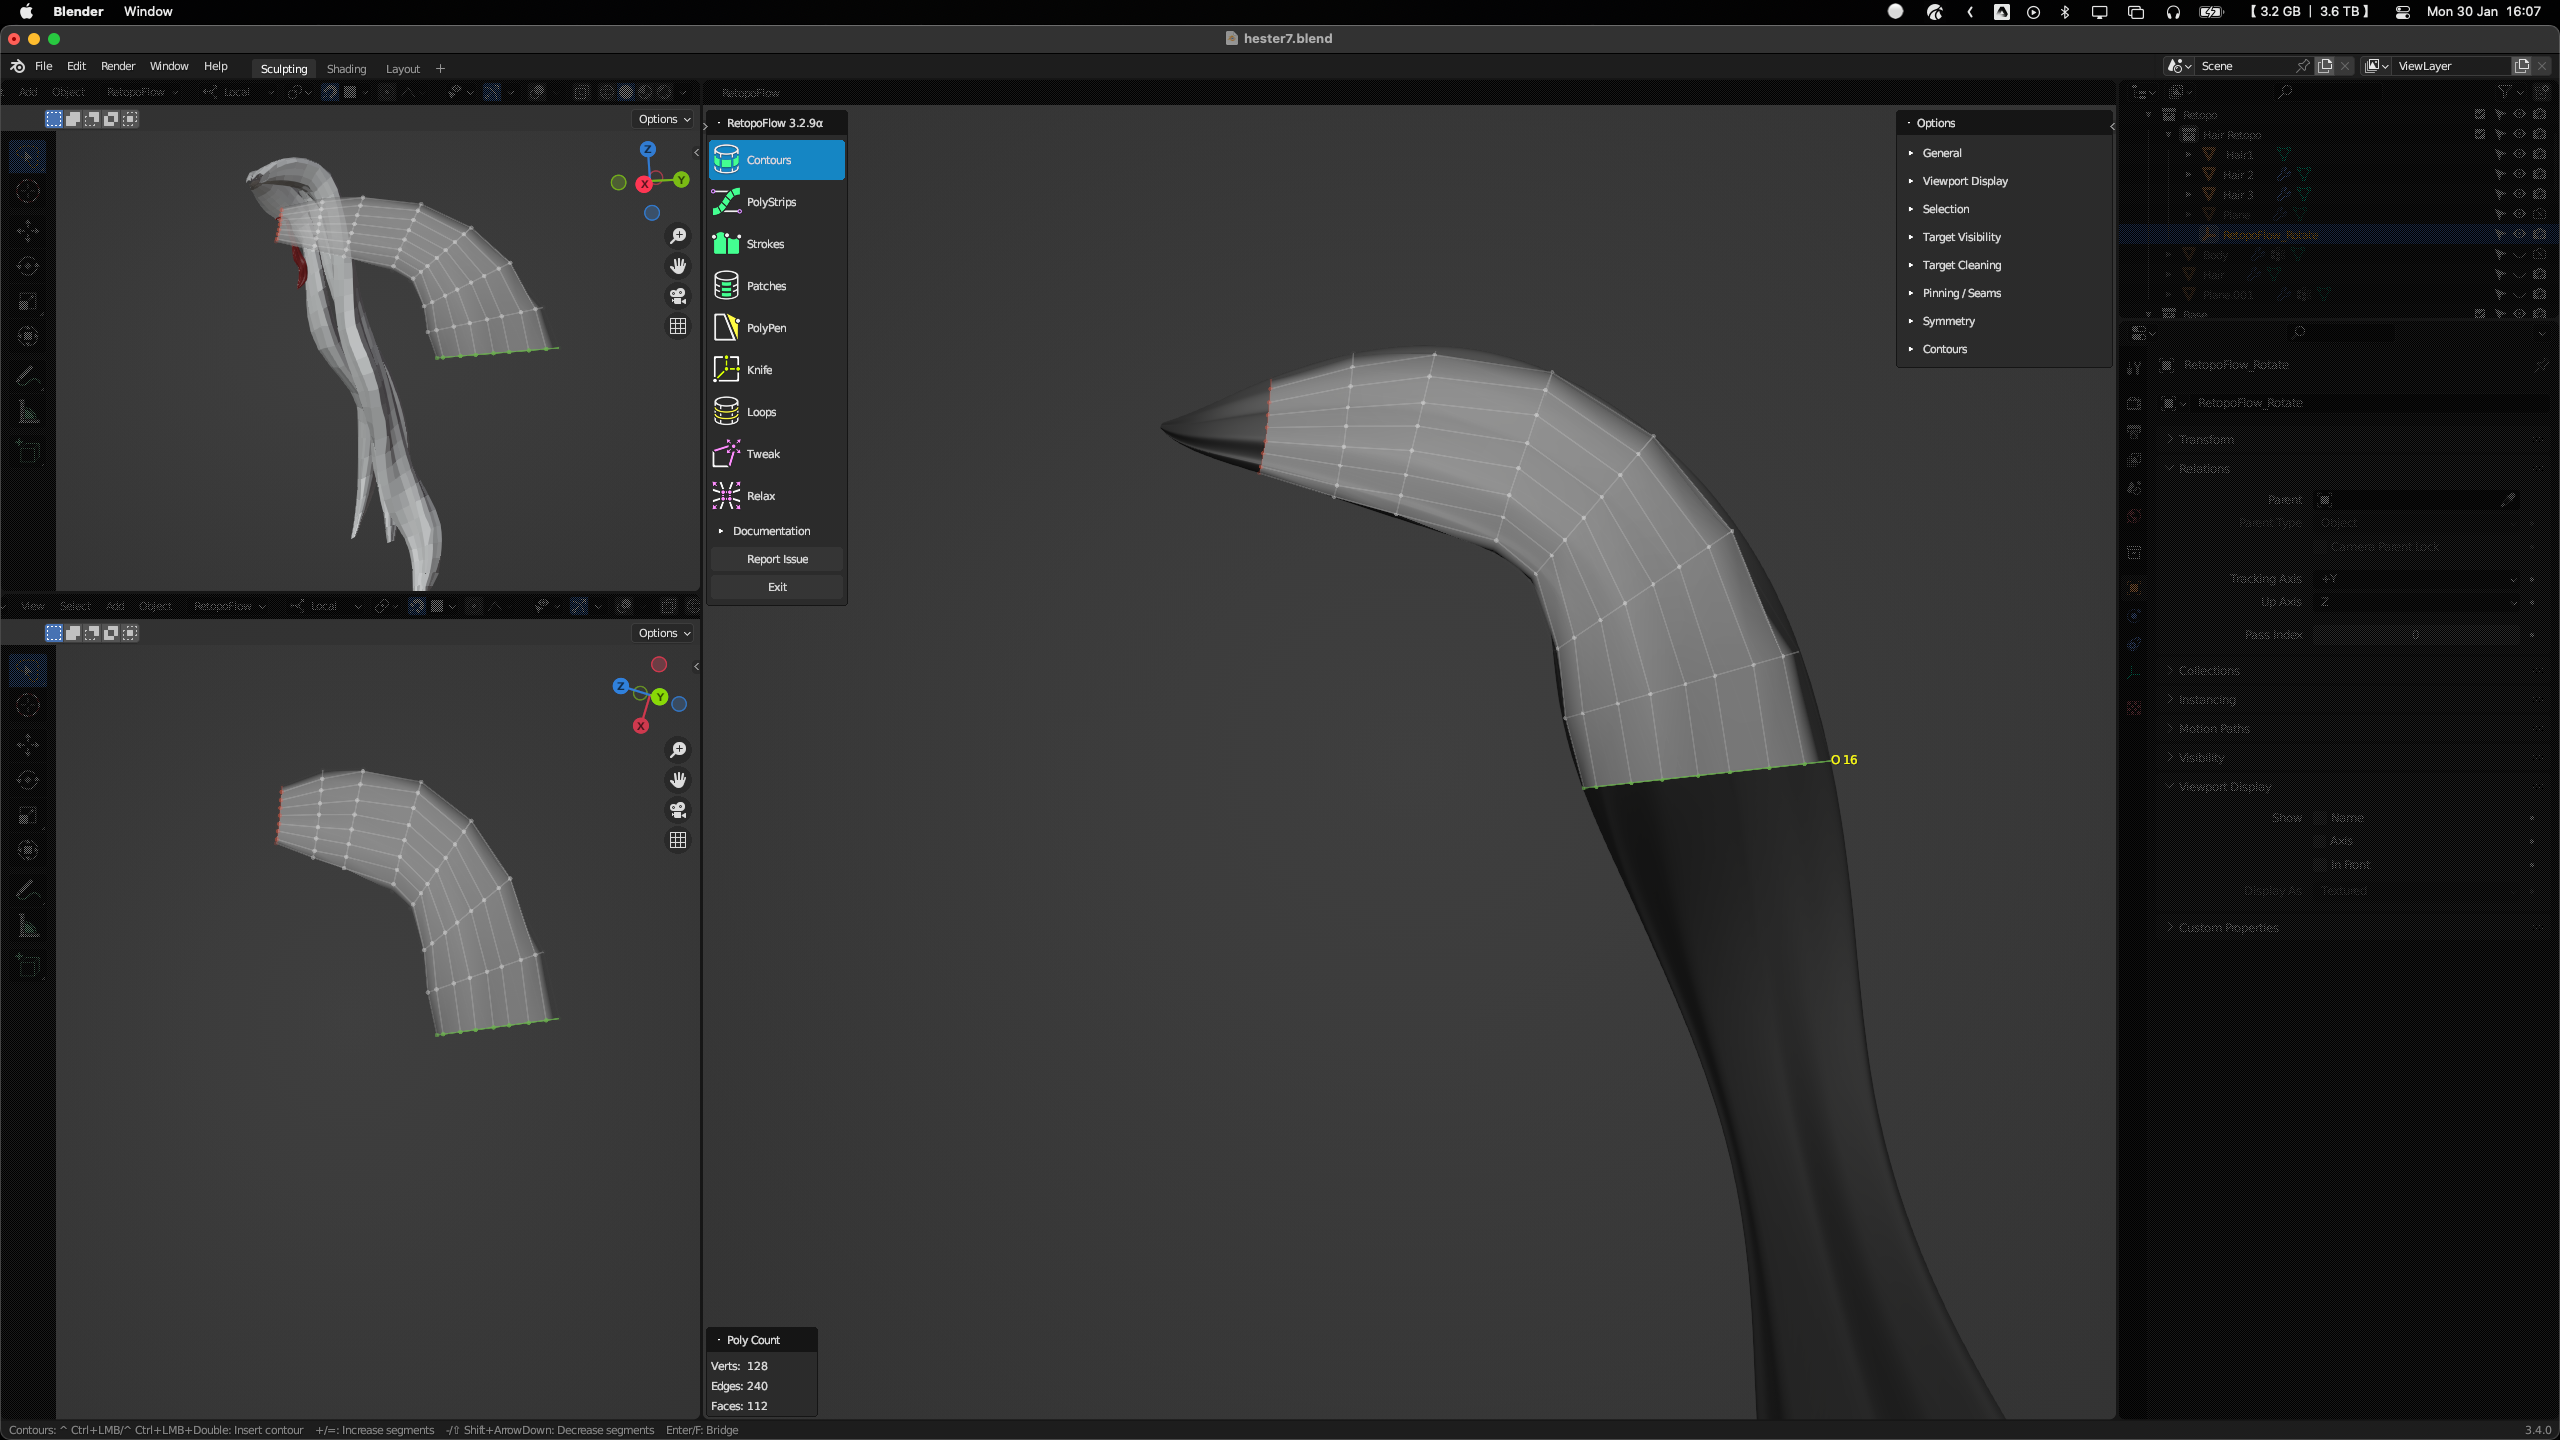 Retopology using Retopoflow
UV Unwrap
Once I had a clean mesh to work with, I created seams and UV unwrapped the meshes so I could include some basic image textures.
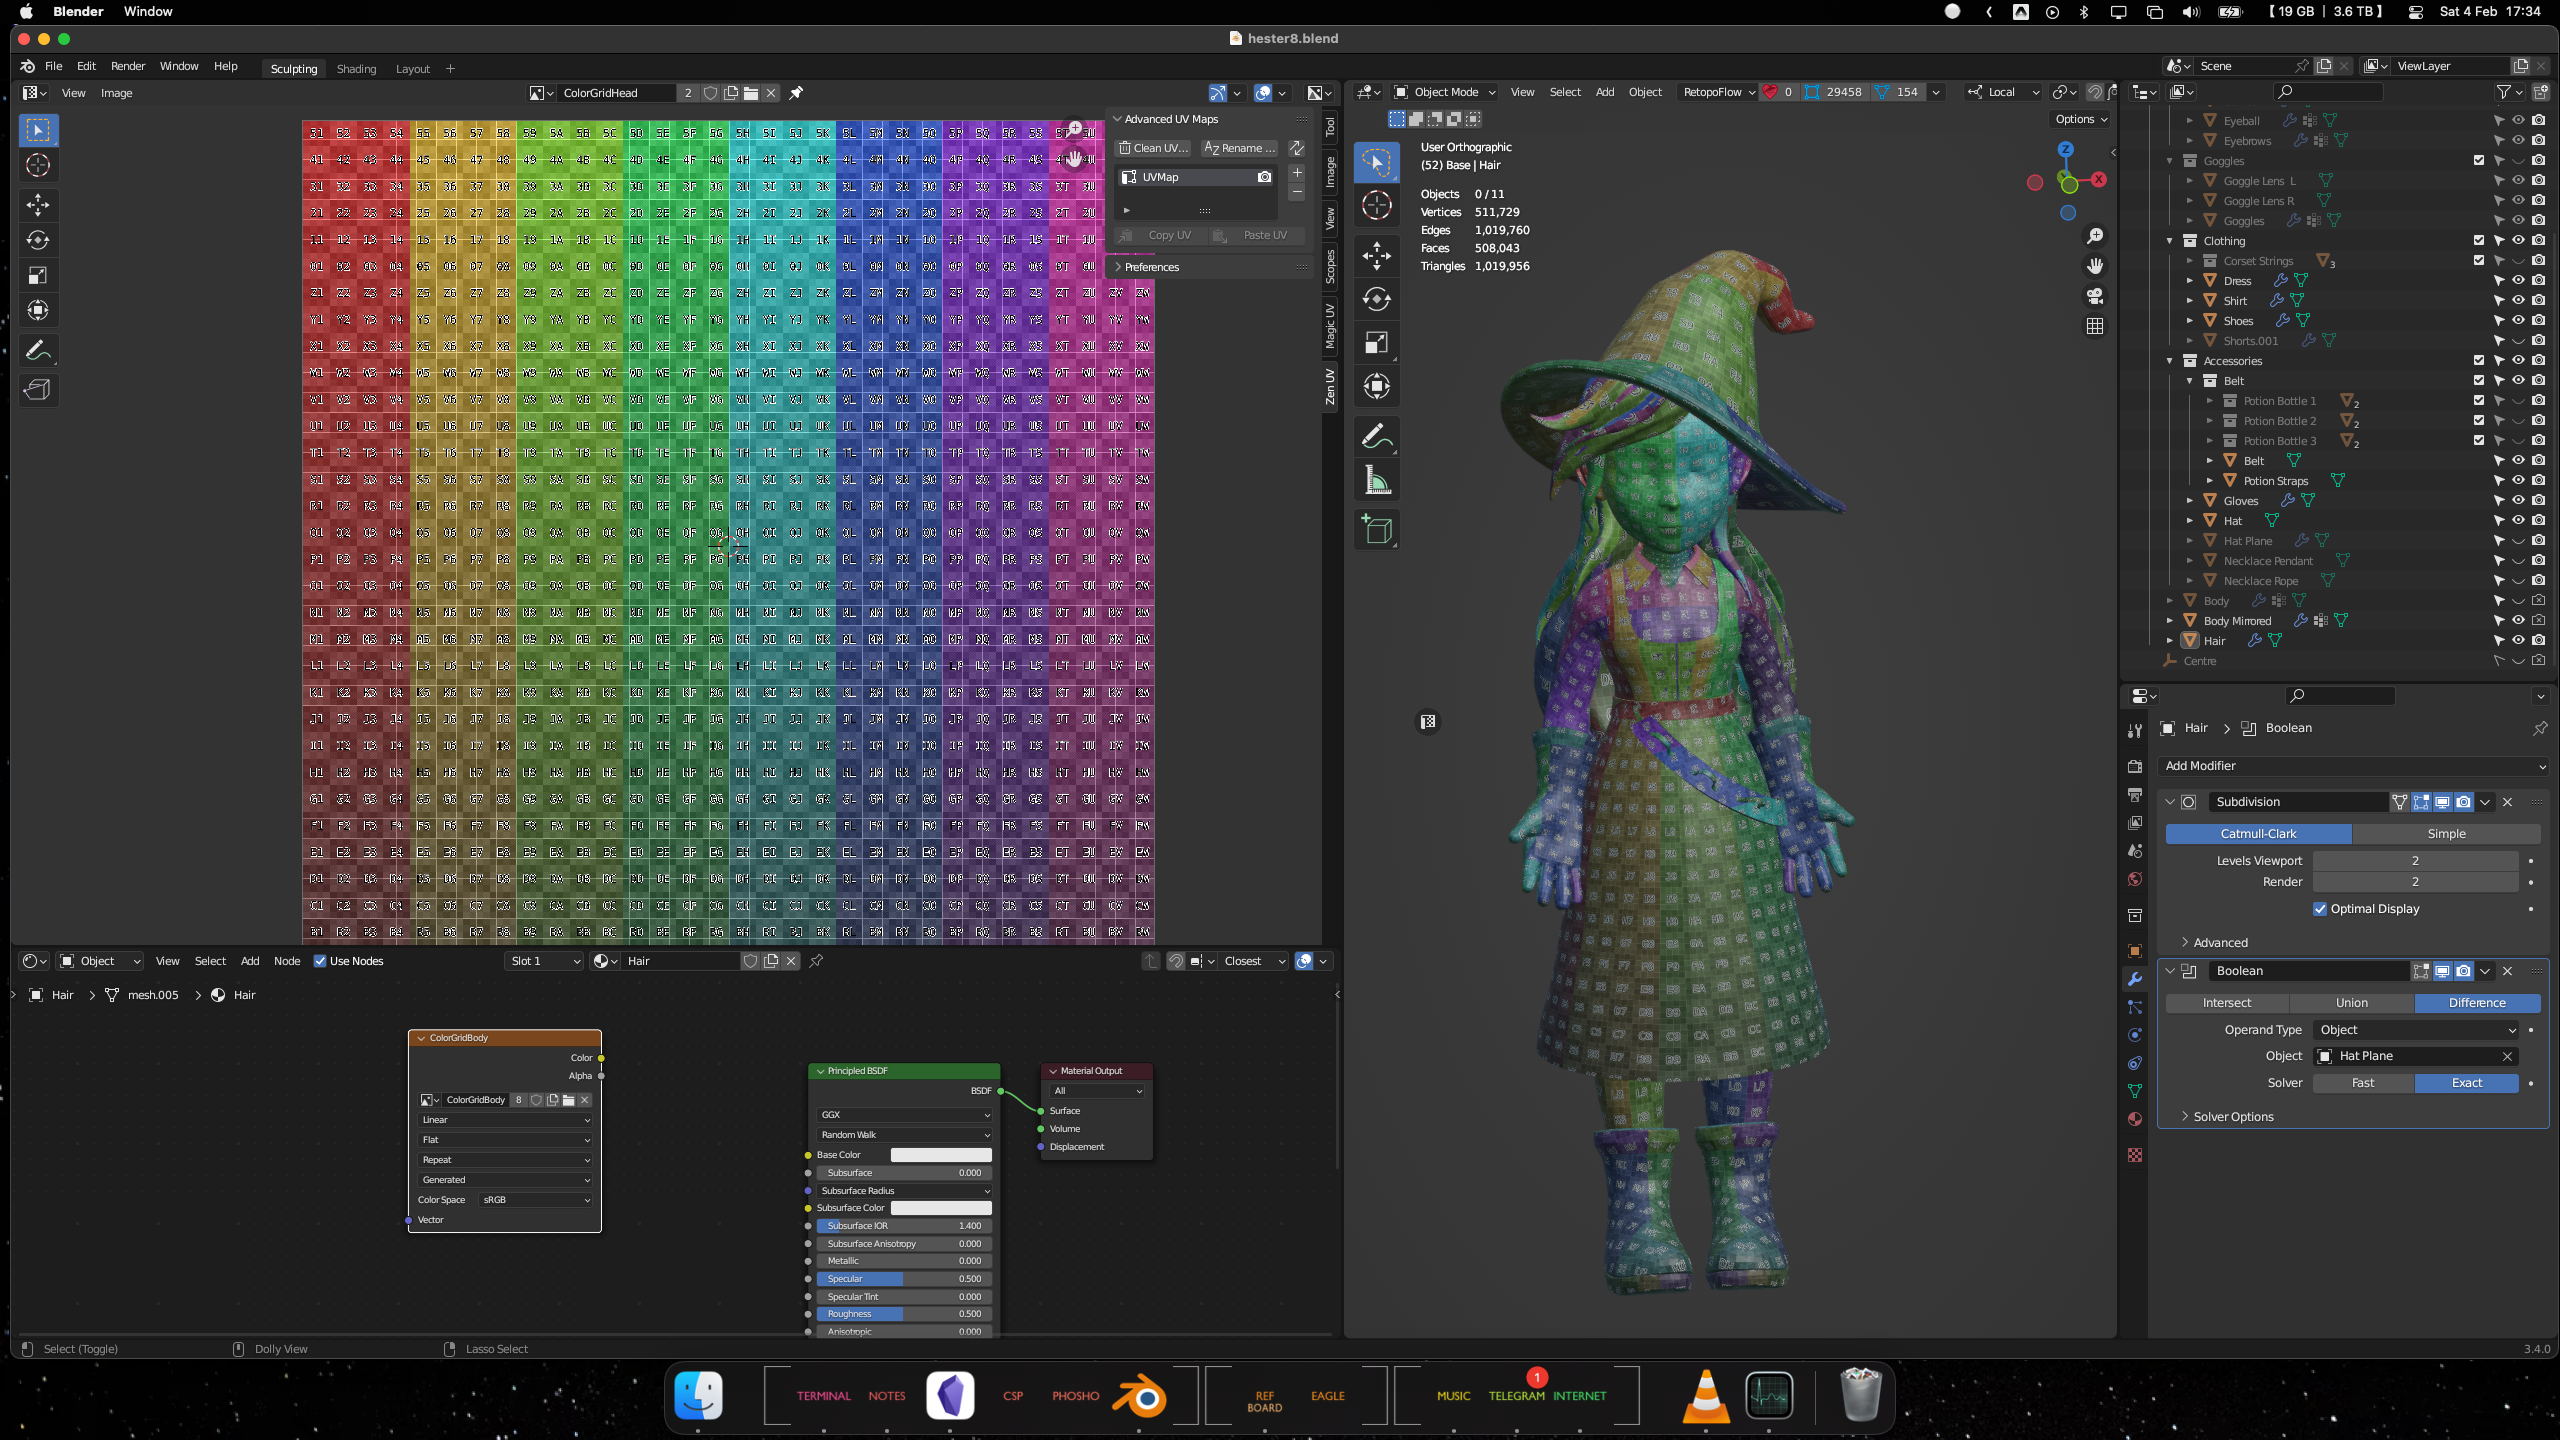 Colour Grid UV map
Texturing
Most textures are plain gradients, but there are a few details.
 Painting some colour onto the face
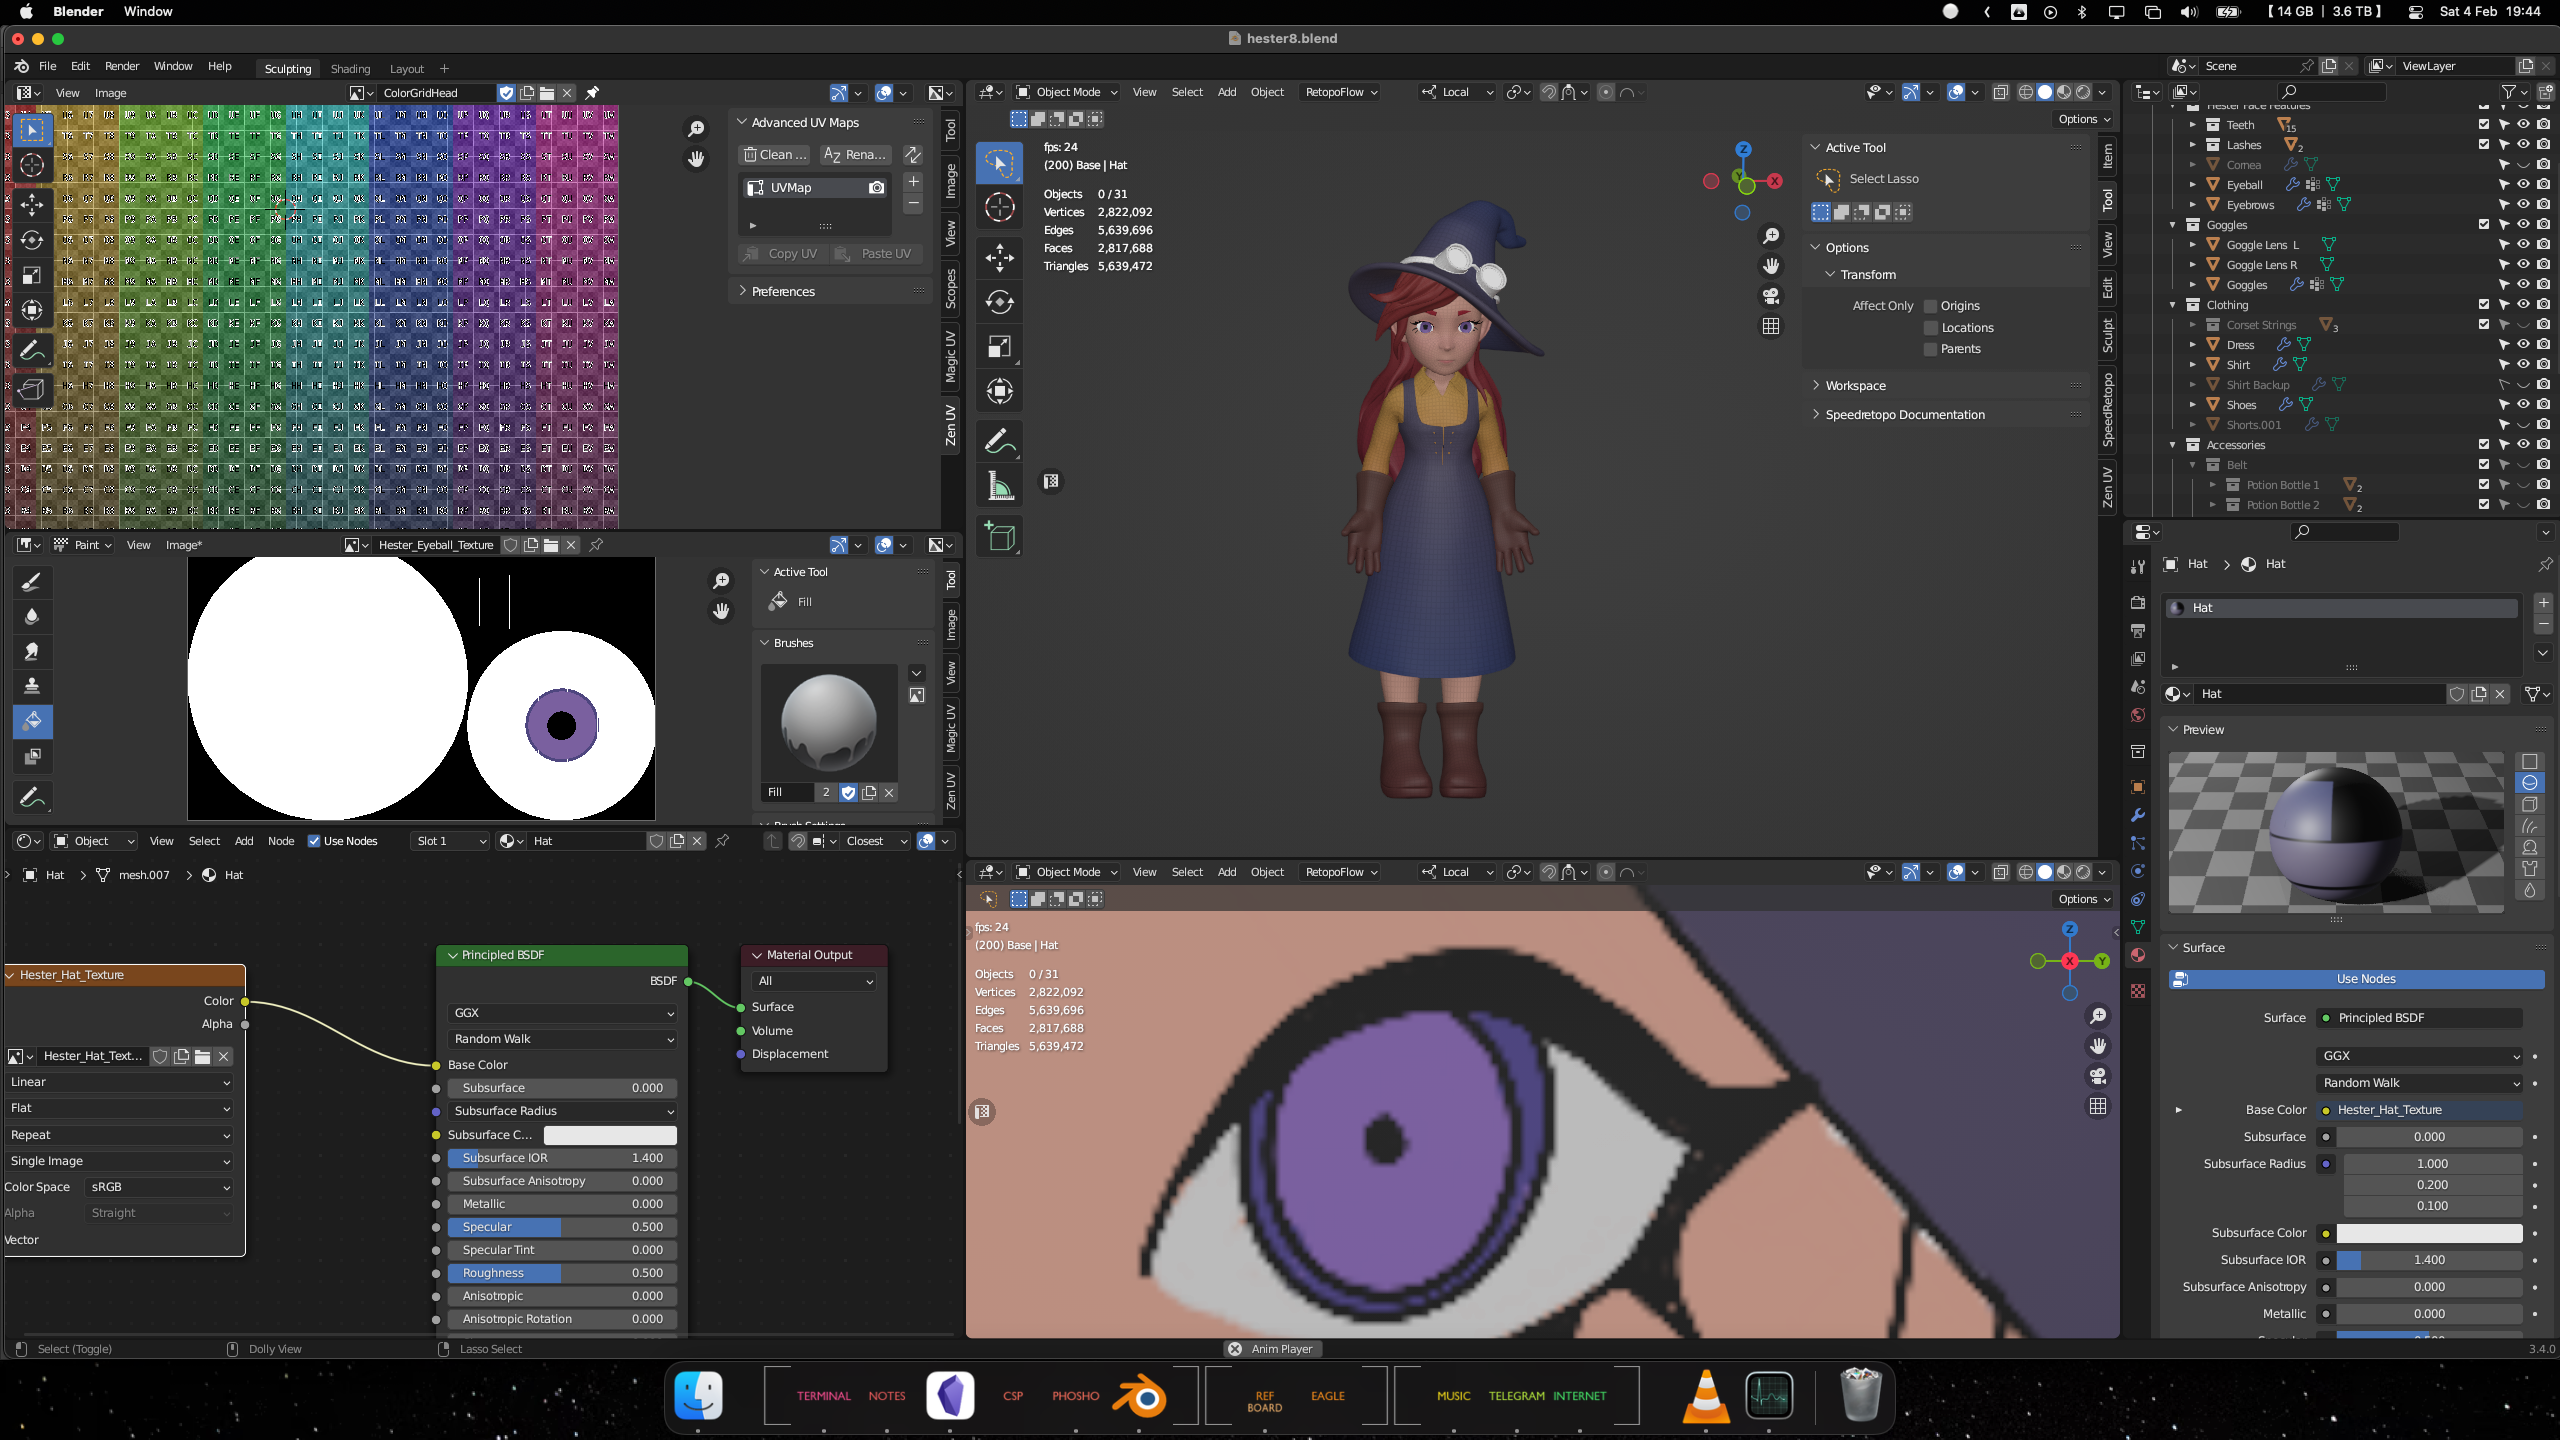 Adding the iris
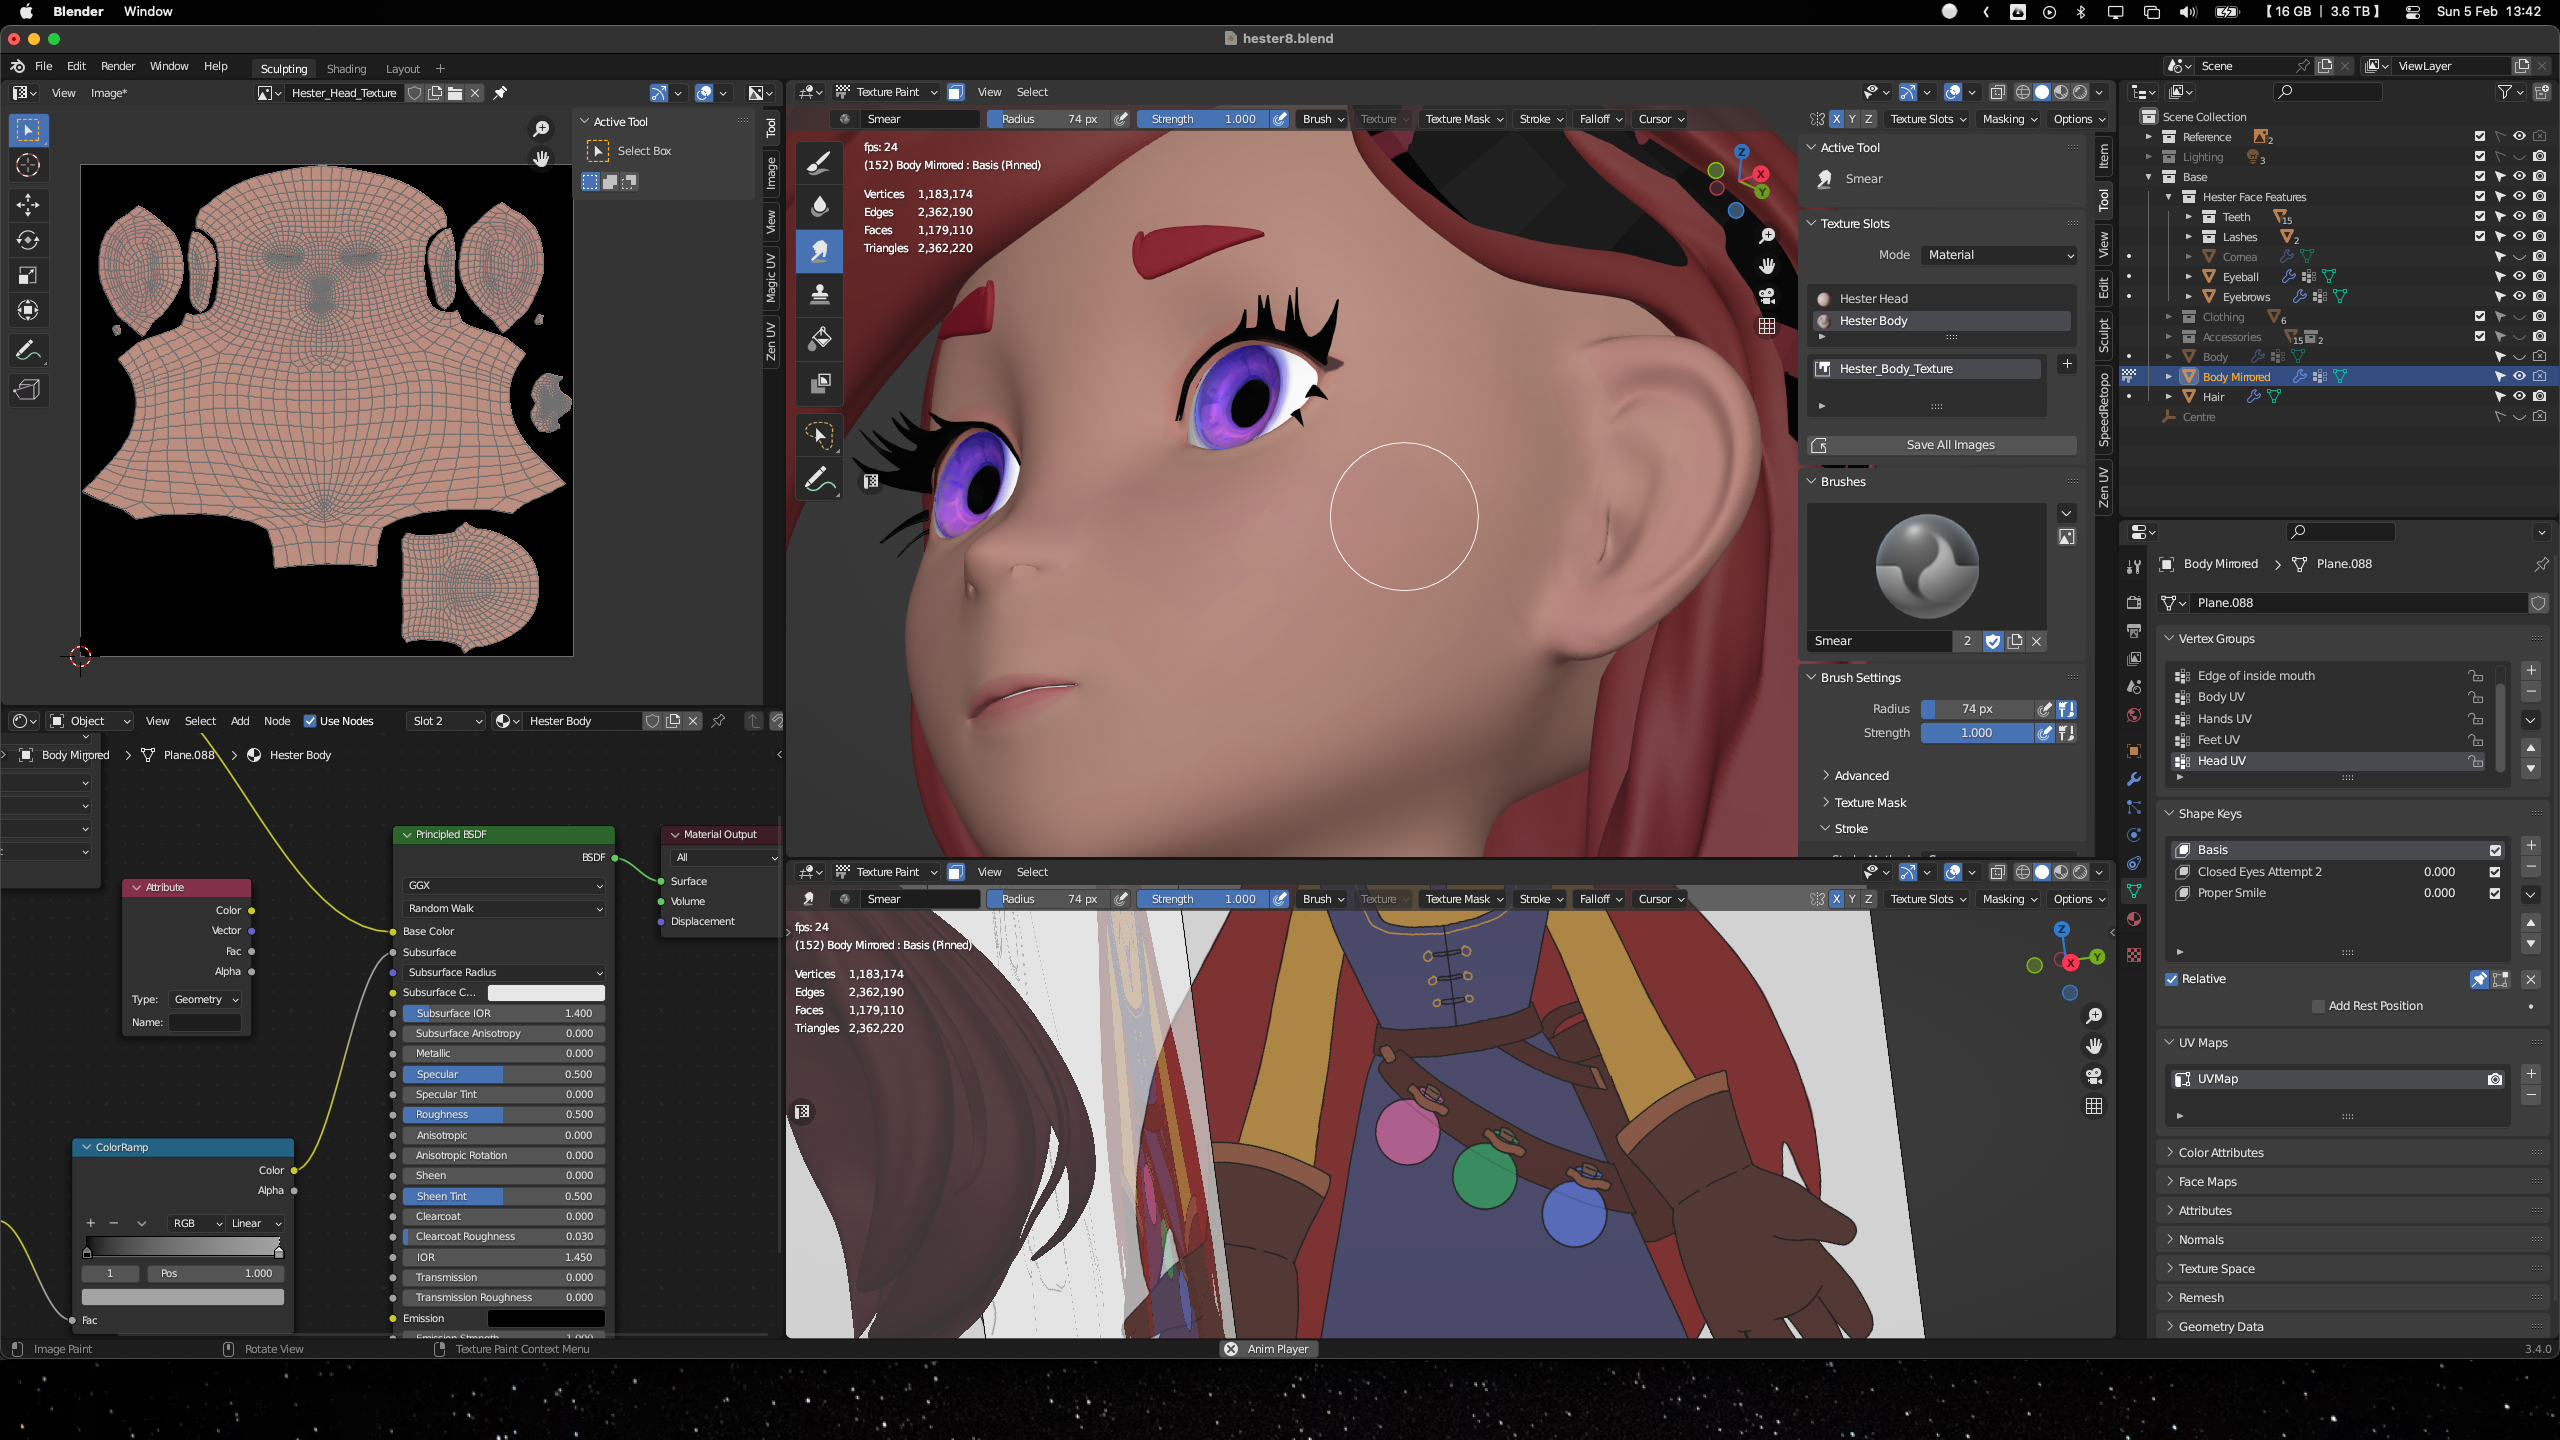
 Some face detail
Rigging
For the animation, I started with Blender's human rig and made tweaks where needed, like adding inverse kinematics for easier posing. To give the hair, hat, and belt a bit of bounce, I added extra bones and used damped tracking constraints.
For the dress, I went with a mesh deform modifier and cloth simulator. I tried a few options, but this was the most effective. I did rig the face too, but in the end, I only animated the eyes.
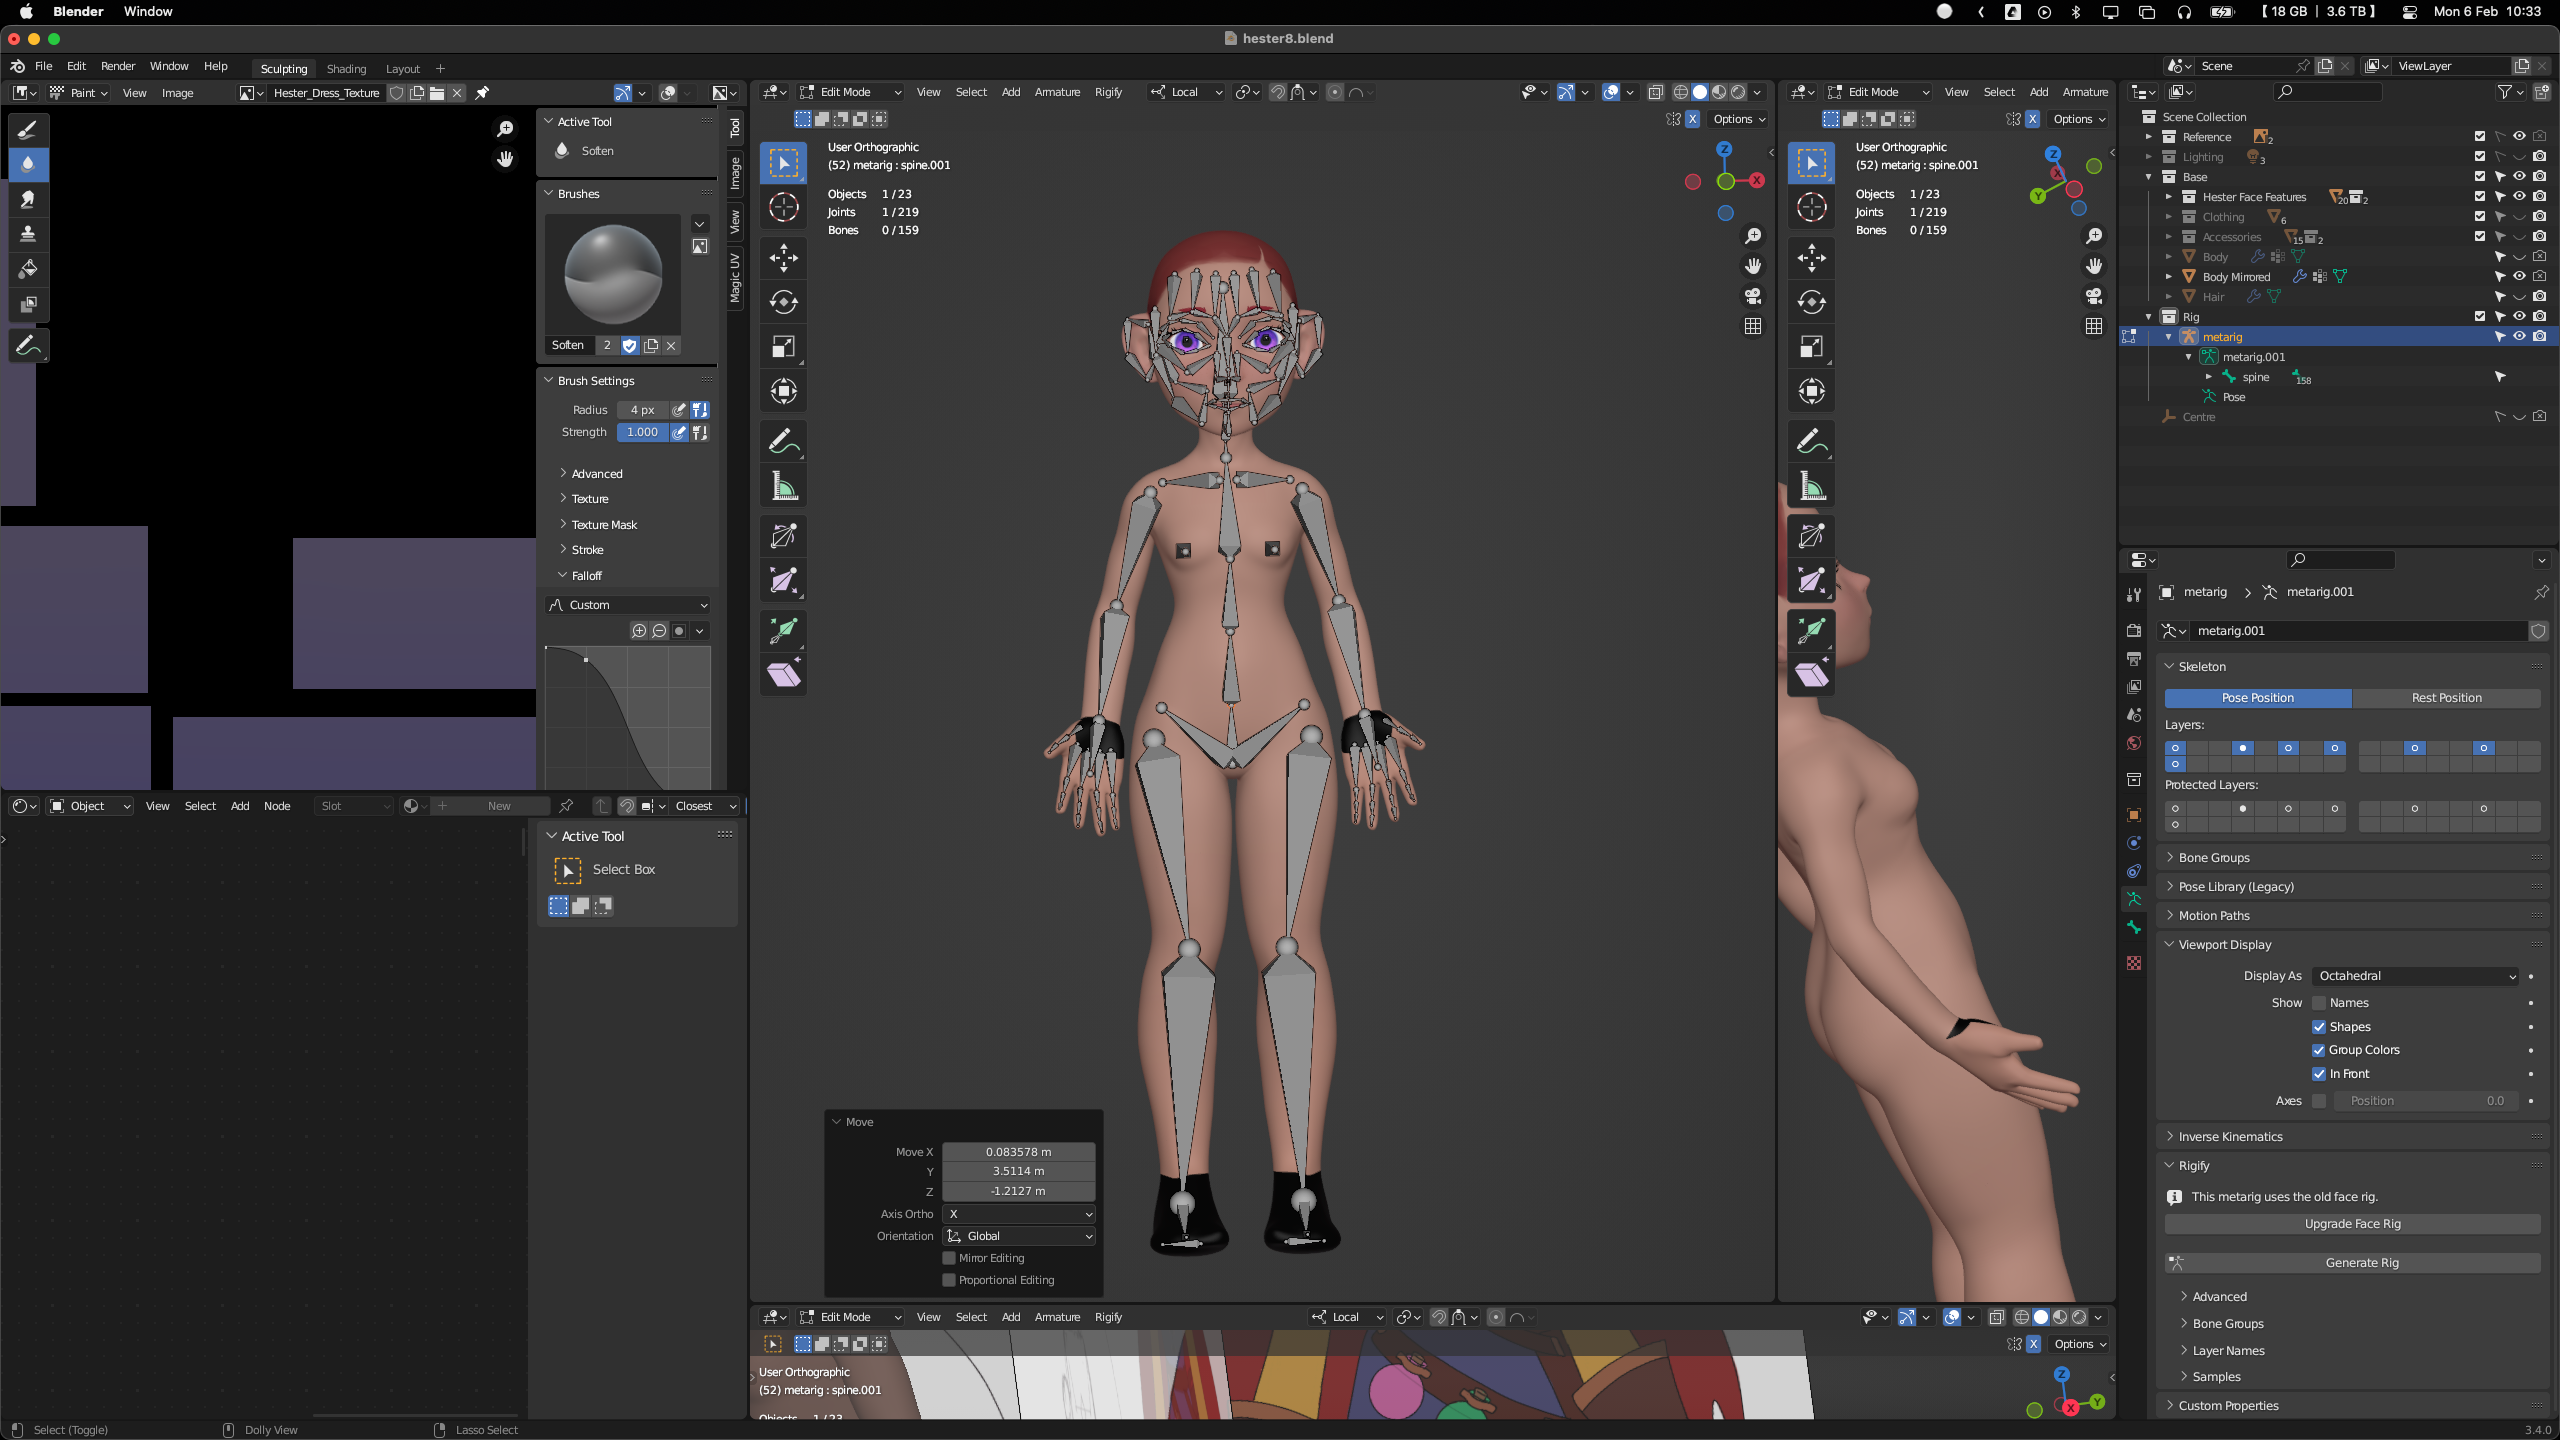 Making the rig
Animation
With the rigging done, I made a basic walk cycle animation. I had planned to show off some of Hester's personality by animating her examining a potion bottle, complete with facial expressions, but ran out of time.
For the simple walk cycle, the dynamic elements of the hat, hair, belt and skirt add a bit more interest.
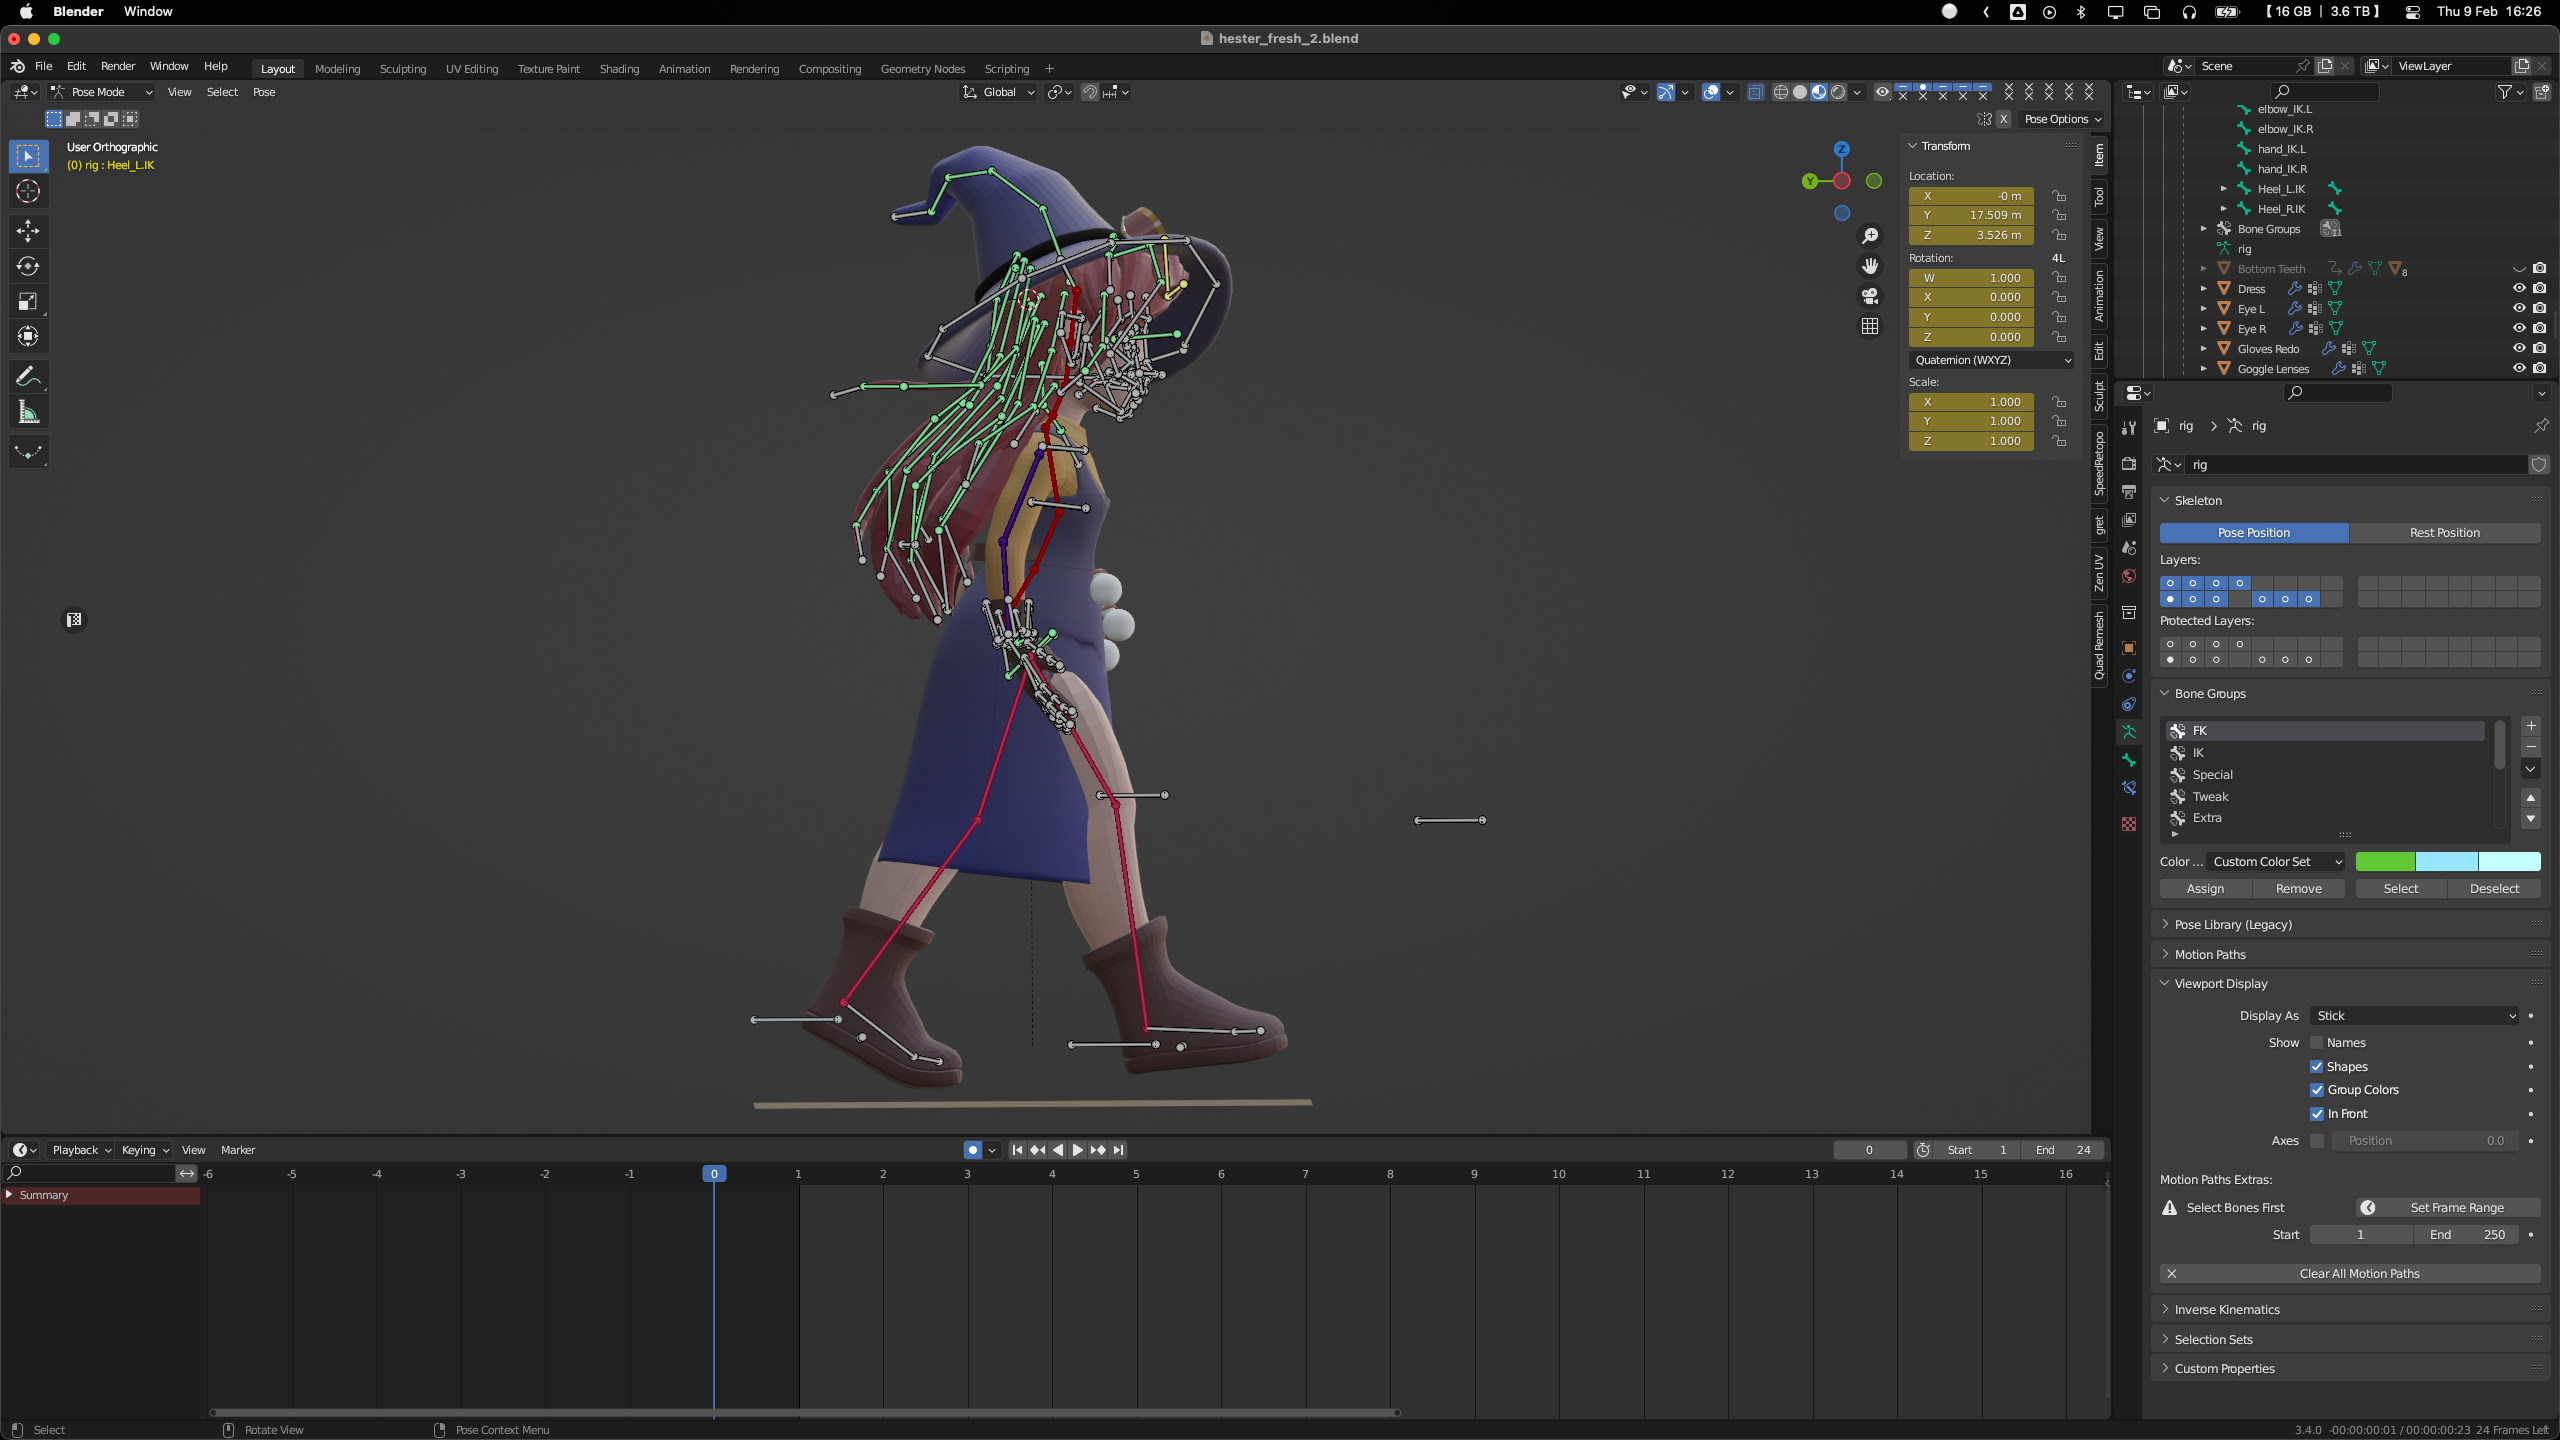 Making the animation
Game Considerations
For a game you'd want to avoid high poly meshes and complicated animations for better performance. To solve this, if it were to be used in a real game I would bake texture details onto a simpler mesh, and also bake preset animations for use in the game.
What I Learned
I made a basic mistake of making the rest pose arms too low down rather than in a T-shape - next time I'll make sure I use a T-pose!
I learned a lot about retopology in this project and really improved my skills. It took a while, especially when I was trying to make the hair animate well, but using the Retopoflow plugin for Blender helped a lot and made the process go much faster. It's also helpful to plan ahead and think about the loops and patches before starting the retopology.
I had a rough time with the hair at first. I made the mistake of creating a solid hair shape, but it just didn't look right when it animated. So I went back to an earlier version where the hair was separated into strands, which produced a much better result.
I wasn't so confident with rigging at first, but working on this project helped me to feel a lot more comfortable with it. I'm excited to keep improving and try rigging animated facial expressions. I also have plans to make a little environment for my character to explore.
Next time around, I'll be much smoother and quicker in my workflow, having learned from all the mistakes I made during this project!
 Quick attempt at a smile